
Mac OS X Printing via the Windows Print Server
Mac OS X Printing via the Windows Print Server
Introduction
With the number of Macs growing, especially in the academic and consumer fields the need to support them has become a must have for many existing Windows environments.
With the number of Macs growing, especially in the academic and consumer fields the need to support them has become a must have for many existing Windows environments.
The question becomes, “How does the competent Windows IT professional open up their print server to their Mac clients?”
Methods Available:There are a several methods of allowing the use of your networked printers to Mac OSX clients. Below is summary of each method and a brief of the pros and cons.
Printing Via LPD (Line Printer Daemon) – (Preferred):This is the easiest to install, and often the most reliable method of printing from Mac OSX to a printer queue installed on a Windows Server.
Primary Advantages / Disadvantages:
Job is submitted within Windows as the logged in user. This is especially useful when using Active Directory services for Mac.
Full document title information as set by the printing application is received by server.
Does not encounter common Kerberos authentication issues such as the popular NT_STATUS_ACCESS_DENIED error for no apparent reason.
Uses a separate port (515), from Windows File and Print Sharing (445).This allows for advanced security options via the Windows firewall to help allow fine tuning which systems or subnets can print via your servers LPD printers.
Requires installation of the Line Printer Daemon printing services, also known as Print Services for Unix on your Windows Print Servers.
Not all Macintosh printer drivers support this method of printing.
Printing Via Windows Print Sharing – (Popular):This option has become greatly popular, especially in the more recent releases of Mac OSX Leopard, Snow Leopard and Lion). In many environments this option can seamlessly integrate printing with a few clicks, and no additional configuration on your print server.
Primary Advantages / Disadvantages:
Job is often submitted as the user who installed the printer, rather than the user logged in. (See more details in the “Install a Printer via Windows Print Sharing” section)
Full Document Title information is not available on the print server. The queue will show “Remote Downlevel Document” in lieu of a usable title such as “A Good Presentation.pdf”
Connects to existing Windows shares, does not requires additional server configuration if printers are already shared to Windows users.
Can be difficult to troubleshoot some authentication issues.
Supported by nearly all Mac printer drivers.
Printing Via Windows Print Services for Macintosh (using AppleTalk) – (Deprecated):This legacy technology is no longer supported by Apple on their newer Operating System releases. While it can still be found in use within older networks, it is considered retired and will not be covered within this article.
Direct Printing (Printing directly via the IP address of the printer) – (Last Resort):This option should only be used as a last resort, as it makes any management or control of printing resources very difficult at best and should be avoided. Installing printers in this manner will not be covered in this article.
Disadvantages:
Little or no control or tracking of printer and associated printer costs.
Little or no security options for printing.
Typically supported by all Mac drivers.
Printing via LPD (Line Printer Daemon) – (Preferred):This section covers setting up this service, and installing and using a printer on Mac OSX. The first step in allowing printing is to enable the LPD service within Windows. This varies slightly between operating system. The below steps specifically apply to various server operating systems.
Configuring your Windows Server to provide LPD Printing Services (Windows 2000 / 2003 / XP):
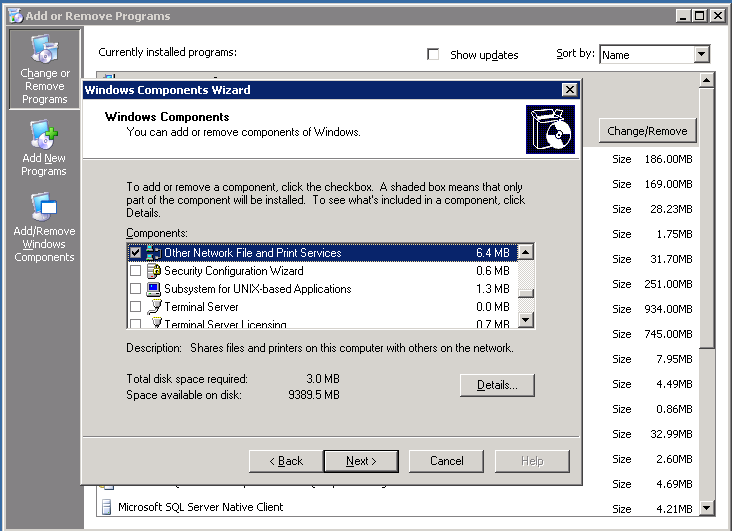
1. Open Add/Remove Windows Components within Add/Remove Programs. Within this location Other network File and Print Services.

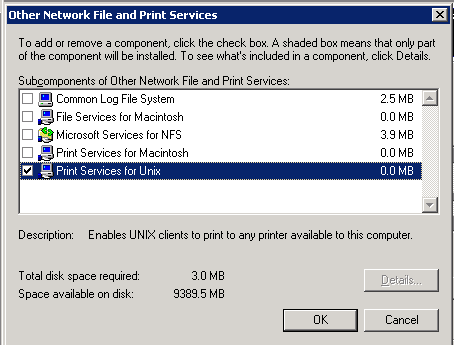
2. Click on the [Details] button and within details check Print Services for Unix and click OK and then [Next] to install these components.
3. Afterwards Windows will install this service. You may be prompted for your Windows Installation Media.
Configuring your Windows Server to provide LPD Printing Services (Windows 2008 / 2008 R2):
1. Run Server Manager and within Roles locate the Print and Document Services role.
2. Within that Role, click the Add Role Services. Here you can add the LPD Service.
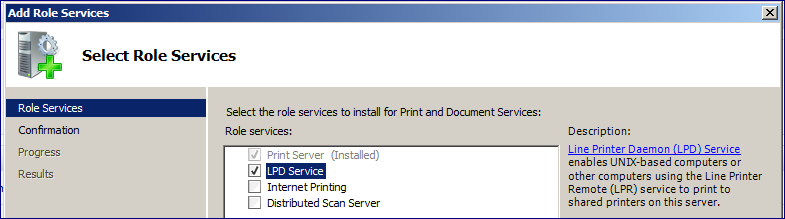
3. Once the role has been installed, you are ready to install printers onto your Workstations.
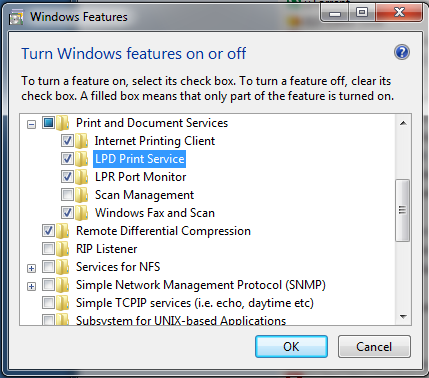
Configuring your Windows Server to provide LPD Printing Services (Windows Vista / 7):
1. Open Control Panel > Programs and Features. Within this dialog, click the [Turn Windows Features on or off] on the left hand side.
2. The Windows Features dialog will open. Locate Print and Document Services and enable the item named LPD Print Server and then click [OK].
Installing the LPD printer on your Mac OS X systems:The next step is to install the printer onto your Mac OS X system using the following steps.
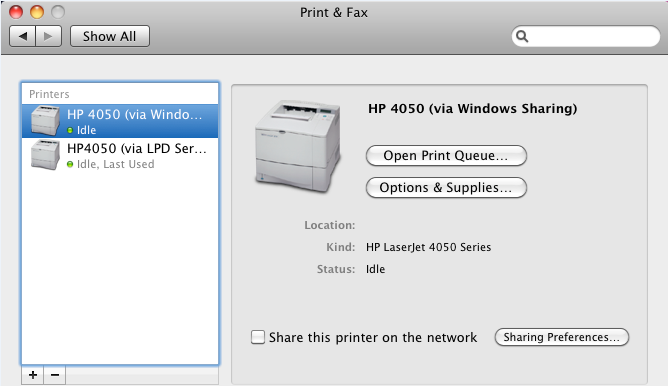
1. Open Print & Fax within the System Preferences of your operating system.
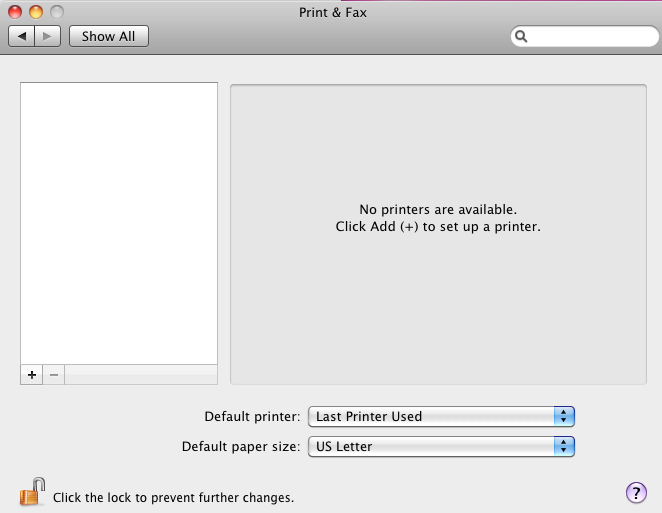
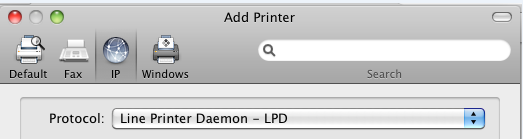
2. Click the [+] button towards the bottom right to install your first printer. The add printer dialog will appear. From here click on the [IP] button at the top of the dialog and then choose Line Printer Daemon – LPD within the Protocol drop down list.
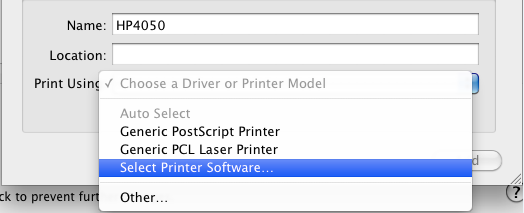
3. Once selected a variety of fields need to be filled in to reference your printer on your print server. The below should guide you to each one.
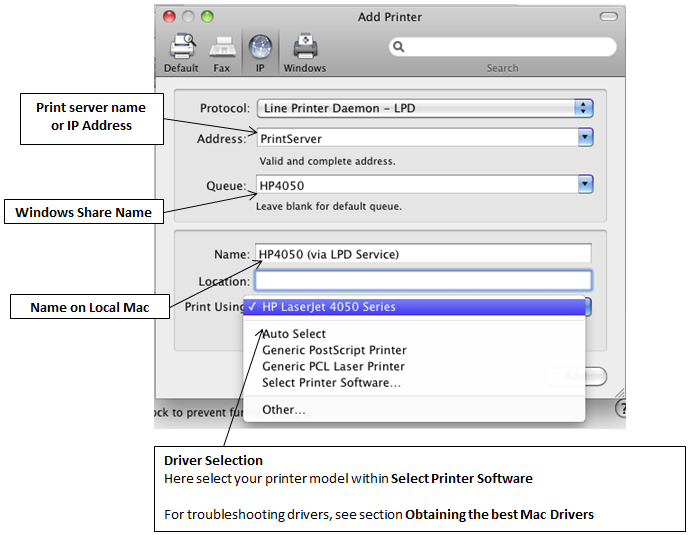
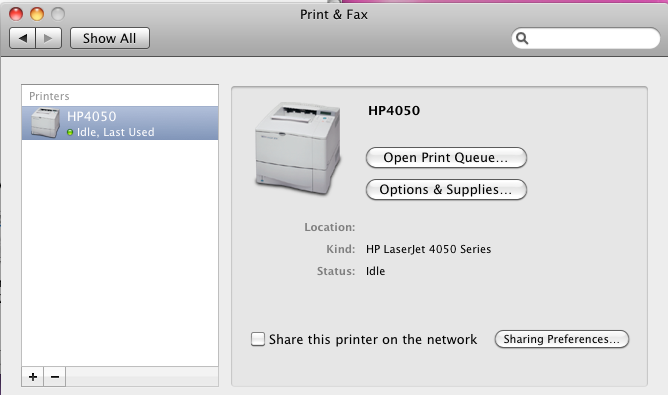
4. Once all is configured, clicking Add should finalize the installation of the printer.
Printing Via Windows Sharing – (Popular):The next step is to install the printer onto your Mac OS X system using the following steps.
Installing a Printer via Windows Printer Sharing:
Open Print & Fax within the System Preferences of your operating system.

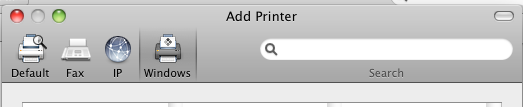
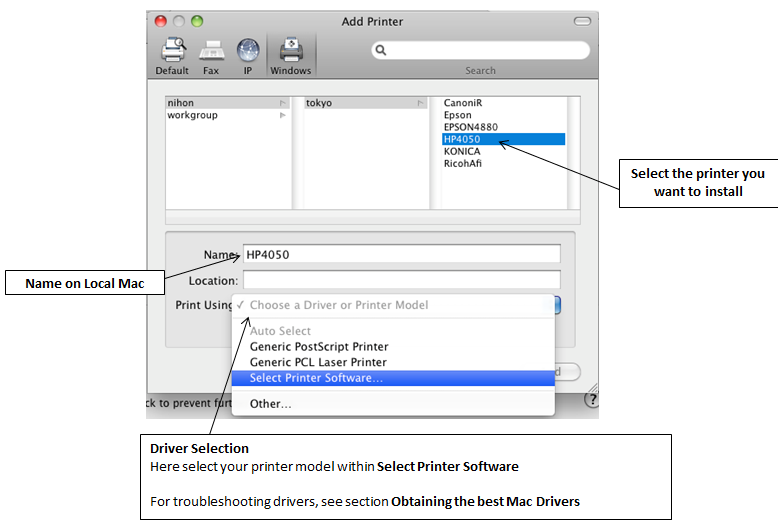
Click the [+] button towards the bottom right to install your first printer. The add printer dialog will appear. From here click on the [Windows] button.
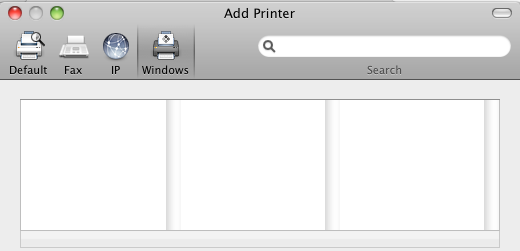
After clicking the [Windows] button, the browse dialog may appear black for several minutes. The system is actually busy locating the available Windows networks, but does not have any indication of this.
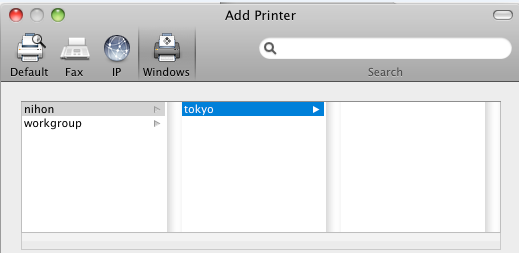
Once the networks have loaded, you can click each network to list the servers within the network. Clicking on the server, will attempt to load the printer shares on that server. Again each click of network or server may take several minutes to load without any indication that it is busy.
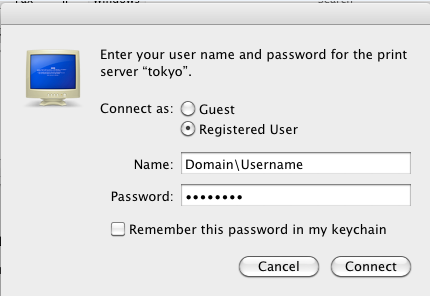
Depending on if you are authenticated, you may next get prompted for a username and password to view the shares on the server. You will need to enter your domain credentials.
After this you will see the list of shared printers.
The printer will not be installed and usable.
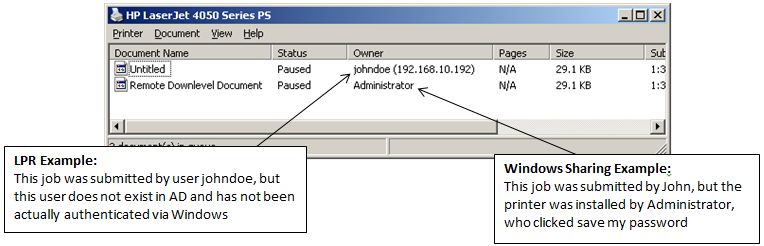
Securing and Restricting Mac OS X PrintingA common issue that comes up when using either of these forms of printing, are ensuring the user printing from Mac is the correct user so their printing can be managed and tracked properly. Consider these two scenarios.
Situation A: Using LPR Printing, without Active Directory Login Services enabled on MacIn this case, the user logged in may not exist in Active Directory and may be a local user that does not reference or match any AD user printing account for quotas and restrictions.
Situation B: Using Printing Via Windows Shares, but a user has saved their passwordIn this case, all print jobs are sent as the first user who happened to click Save my password. In a print tracking scenario, this would show a false statistic regarding who is actually printing each job.
The Solution:The solution to these issues, is Print Manager Plus with the Client Billing & Authentication add-on option. This add-on option requires explicit authentication on each print job by interacting with the Authentication Module running on each Mac.
This will provide the following functionality, on top of all of the tracking and control functionality included with Print Manager Plus.
- All jobs will be tracked under the user actually printing it
- Prevents unauthorized printing
- Allows quota and restrictions by Active Directory user, group and OU to extend to Mac users
- Can require users to verify each job before it prints to ensure they need it
Obtaining Mac DriversThis final section includes some tips for obtaining Mac versions of drivers for the various models of printers that exist. Below are three most common means of finding and selecting a driver.
Source A: The Print Manufacturer – (Preferred)The most popular source of drivers is through your printer manufacturers website. Most modern printers are well supported under Intel based Mac OSX 10.5 and later systems. Browsing their support.
Known Issues:In rare situations, a manufacturer will not provide any Mac drivers for their device.
In rare situations, the driver they provide may support the LPD method of printing described above.
In rare situations, the driver they provide may support the LPD method of printing described above.
Source B: Third Party Drivers such as Gutenprint – (Alternative)If you are having trouble obtaining drivers for your printer, or are having trouble getting them to work via the LPD print server, you may want to consider third party drivers. Gutenprint, also known as Gimp-Print is an open source community project designed to provide fully functional drivers for a large variety of print devices.
Known Issues:The list is vast, but does not support all printers.
May not provide all of the advanced printing options your device is capable of.
May not provide all of the advanced printing options your device is capable of.
Source C: Generic Drivers – (Alternative)The final step is to use generic drivers using either the Postscript (PS) printing language, or the Print Control Language (PCL). These are available directly when installing the printer.
Known Issues:Requires a device that supports native Postscript or PCL printer commands
Provides a limited set of basic printer features only. Will not support any advanced features your device may support.
Provides a limited set of basic printer features only. Will not support any advanced features your device may support.

 Other author currently editing the document
 All authors currently editing the document
 Changes from other authors available on the server
 , enter the URL to the SharePoint library, and then clickAdd.NOTE By default, many SharePoint sites have a Shared Documents library. An example of a URL that links to this library is http://fabrikam/shared%documents.
 .
.

 to refresh the document with updates.
 on the Standard toolbar to refresh the document with updates that were made by other authors.
 does not restore a block.