The easiest way to create a new user in an Active Directory domain is using the Active Directory Users and Computers MMC snap-in. However, what if you need to create multiple user accounts in bulk, or ADUC is not available for some reason? In this article, we explain several ways to create Active Directory user accounts with PowerShell using the New-ADUser cmdlet.Handpicked related content:
Create New User Accounts using the New-ADUser Cmdlet
So what is the PowerShell cmdlet used to create user objects? It’s the New-ADUser cmdlet, which is included in the Active Directory PowerShell module built into Microsoft Windows Server 2008R2/2012 and above. Therefore, the first thing we need to do is enable the AD module:
Import-Module ActiveDirectory
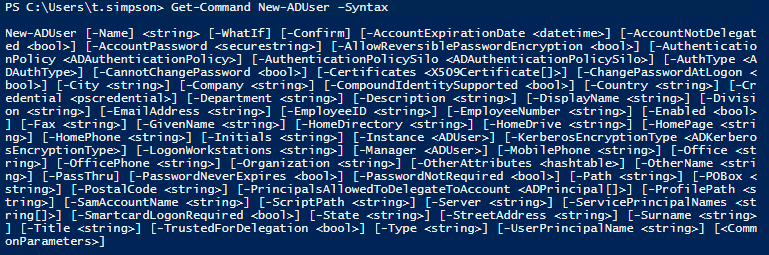
Now let’s take a closer look at cmdlet New-ADUser. We can get its full syntax by running the following command:
Get-Command New-ADUser –Syntax
When you know the syntax, it’s easy to add users to Active Directory:
New-ADUser B.Johnson
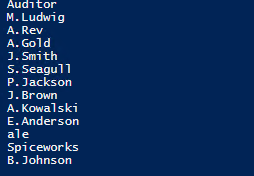
Now let’s check whether the user was added successfully by listing all Active Directory users using the following script:
Create a New Active Directory User Account with Password
Accounts are created with the following default properties:
Account is created in the “Users” container.
Account is disabled.
Account is a member of Domain Users group.
No password is set.
User must reset the password at the first logon.
Therefore, to make a new account that’s actually usable, we need to enable it using the Enable-ADAccount cmdlet and give it a password using the Set-ADAccountPassword cmdlet.
So let’s create a new account with the following attributes:
The Read-Host parameter will ask you to input new password. Note that the password should meet the length, complexity and history requirements of your domain security policy.
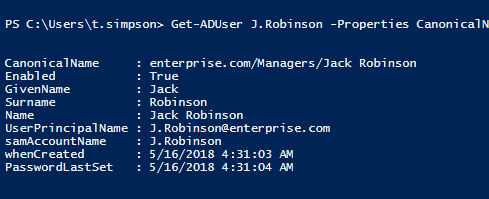
Now let’s take a look at the results by running the following cmdlet:
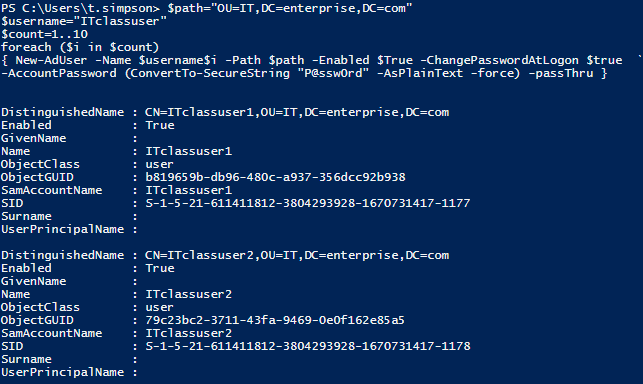
Now, let’s make our task a little bit harder and create ten similar Active Directory accounts in bulk, for example, for our company’s IT class, and set a default password (P@ssw0rd) for each of them. To send the default password in a protected state, we must use the ConvertTo-SecureString parameter. Here’s the script to use:
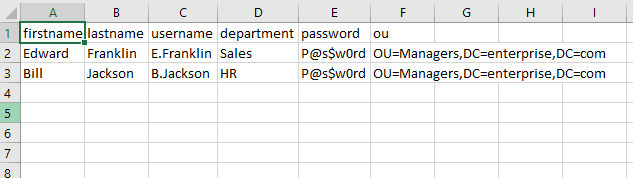
Another option for creating users in AD is to import them from a CSV file. This option is great when you have a list of users with predefined personal details such as:
FirstName
LastName
Username
Department
Password
OU
The CSV file must be in UTF8 encoding and contain contact data that looks like this:
The following script will create enabled user objects for any users in the CSV that don’t already have accounts in AD. The “Reset password at the next logon” option will be enabled for the new accounts, so you can use your default password:
#Enter a path to your import CSV file
$ADUsers = Import-csv C:\scripts\newusers.csv

foreach ($User in $ADUsers)
{

       $Username    = $User.username
       $Password    = $User.password
       $Firstname   = $User.firstname
       $Lastname    = $User.lastname
    $Department = $User.department
       $OU           = $User.ou

       #Check if the user account already exists in AD
       if (Get-ADUser -F {SamAccountName -eq $Username})
       {
               #If user does exist, output a warning message
               Write-Warning "A user account $Username has already exist in Active Directory."
       }
       else
       {
              #If a user does not exist then create a new user account

        #Account will be created in the OU listed in the $OU variable in the CSV file; don’t forget to change the domain name in the"-UserPrincipalName" variable
              New-ADUser `
            -SamAccountName $Username `
            -UserPrincipalName "$Username@yourdomain.com" `
            -Name "$Firstname $Lastname" `
            -GivenName $Firstname `
            -Surname $Lastname `
            -Enabled $True `
            -ChangePasswordAtLogon $True `
            -DisplayName "$Lastname, $Firstname" `
            -Department $Department `
            -Path $OU `
            -AccountPassword (convertto-securestring $Password -AsPlainText -Force)

       }
}
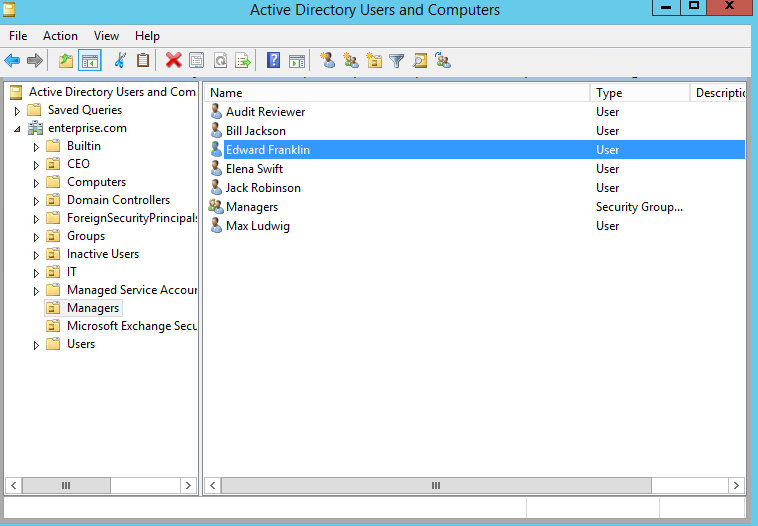
After script execution, we have two new users, Edward Franklin and Bill Jackson, in our Active Directory domain:
Let’s take a look at their details by running Get-ADUser cmdlet again:
Now you know how to create users in Active Directory using PowerShell scripts. Try performing some account creations, bulk account creations and CSV imports yourself on local or remote systems. Remember, the ADUC MMC snap-in is great for creating a few users with extended attributes, but PowerShell is much better for importing a large number of user accounts in bulk.
In this guide, I’m going to show you how to create bulk OUs in Active Directory using PowerShell.
Maybe you are migrating to a new domain, server, merging with another company, or creating a lab environment. Whatever the case PowerShell can be used to quickly create a bunch of OUs and save you time.
Let’s get started.
The New-ADOrganizationalUnit command
The New-ADOrganizationalUnit cmdlet creates an Active Directory organizational unit (OU).
Here is an example:
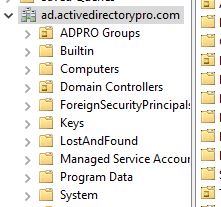
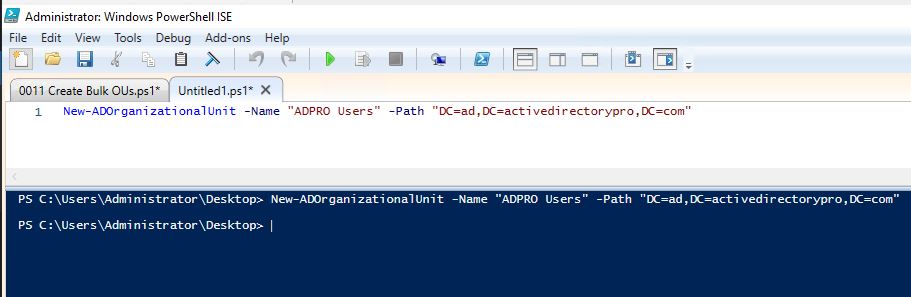
The command below will create the OU “ADPRO Users” under the path DC=ad,DC=activedirectorypro,DC=com
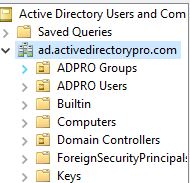
Before I run the command here is a screenshot of Active Directory, you can see ADPRO Users do not exist.
Now Open PowerShell ISE and run the command.
Refresh AD and the OU is now there.
That was an example of creating a single OU with PowerShell. Now let’s look at how to create a bunch of OUs.
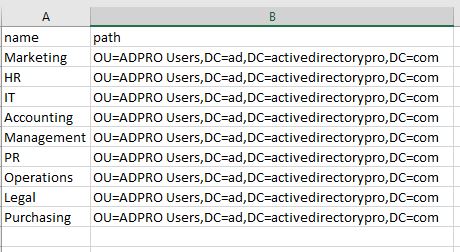
Step 1: Create a CSV file with a name and path header.
Step 2: Add the OU names under the name column and the path to where you want them created in AD.
In the above screenshot, I’m going to create several OUs (Marketing, HR, IT, and so on) in the ADPro Users OU.
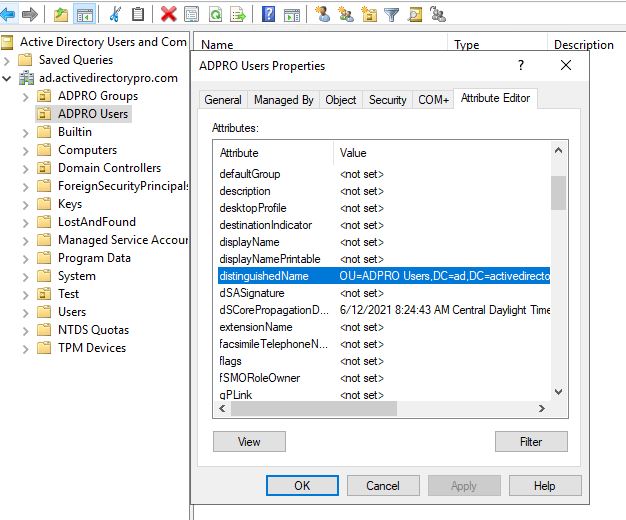
The path is the distinguishedName of the OU. To find this go to the OU, right-click, select properties, then select the attribute editor.
Step 3: Save the CSV
You can save it anywhere you want.
Step 4: Copy and Pase the script below into PowerShell ISE
# This script is used for creating bulk organizational units.

# Import active directory module for running AD cmdlets
Import-Module activedirectory

#Store the data from the CSV in the $ADOU variable.
$ADOU = Import-csv C:\it\ou.csv

#Loop through each row containing user details in the CSV file
foreach ($ou in $ADou)
{
#Read data from each field in each row and assign the data to a variable as below

$name = $ou.name
$path = $ou.path

#Account will be created in the OU provided by the $OU variable read from the CSV file
New-ADOrganizationalUnit `
-Name $name `
-path $path `

}
Modify line #7 and update the path to your CSV. I called my CSV ou.csv and saved it to the c:\it folder so my line 7 looks like this.
Step 5. Run the script
Click the “run script” button to run the script.
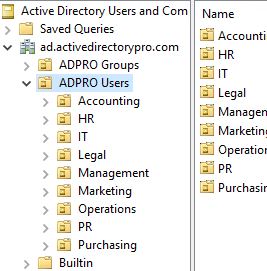
Refresh AD and you should see the newly created OUs.
Conclusion
In this guide, I showed you how to create a single OU and how to create bulk OUs by using the New-ADOrganizationalUnit cmdlet. I use this script to quickly rebuild my lab environment. I do a lot of testing in Active Directory so I often need to rebuild it from scratch to test new builds of the ad pro toolkit. This script helps to simplify the rebuild process of AD.
في هذا المقال سأستعرض عليكم تغريدات تمت مشاركتها من قبل الدكتور عبدالله في تغريدة نشرها في تاريخ 20 اغسطس 2020. واحببت نقلها ليستفيد منها من يتصفح المدونة.
اذا كان عندك عرض لبحثك أمام مشرفك و زملائك و أعضاء هيئة التدريس وتشعر بالقلق الشديد أنصحك بقراءة هذا الثريد بإذن الله راح يفيدك.
في هذا الثريد سأتكلم عن الخطوات التي تساعدك ليكون عرضك و حضورك أقوى. ( هنا لن أتحدث عن تصميم العرض بل حضورك أثناء العرض كمقدم)
1.توقع بأنه خلال عرضك سيتم سؤالك عن أمور ليست لها علاقة بما تعرض. في هذا الحالة يجب أن تجيب بهدوء و بأدب والأهم بعدم سخرية.
2. توقع بأنه سيتم سؤالك اسئلة بديهية و انت مقتنع بداخلك بأنها اسئلة غبية و سخيفة ولكن تعلم أن تجيب على مثل هذه الاسئلة بأدب و اهتمام لأنها تعكس احترامك لأي متعلم يقوم بسؤالك أسئلة مشابهة في المستقبل.
3.إذا لم تفهم السوال الموجه لك، حينها يجب عليك أن تستوضح من السائل او أطلب منه إعادة السؤال مرة أخرى.
4. حاول أن تجيب على الأسئلة إجابة كاملة وواضحة فهذا يعطي للمتلقي الحماس لكي يسأل و أيضا يعطي انطباع إيجابي حول تمكنك من بحثك.
5.قد يتم سؤالك في أمور لم تتطرق لها خلال عملك البحثي، في هذه الحالة لا تقلق، و تكون الإجابة ببساطة:
( هذه نقطة مثيرة للاهتمام سأبحث عنها )
6.هناك بعض الأسئلة المعقدة و التي قد تأخذ وقتا طويلا للإجابة عليها، حينما يتم سؤالك بمثل هذا النوع من الاسئلة فالأفضل ان تجيب إجابة مختصرة حفاظا على الوقت ومن ثم تخبر السائل بأنك ستتناقش معه لاحقا للإجابة على سؤاله بشكل مفصل.
7.سيتم سؤالك اسئلة ليست لها علاقة بعملك البحثي، في هذه الحاله تكون إجابتك ببساطة:
( ليست ضمن نطاقي البحثي أو ليست من الأمور التي يجب أن اعمل عليها خلال هذه الفترة).
8. لا تكن مشدود الأعصاب أو في حالة غضب و أنت تجيب على الأسئلة الموجهة لك أو في حال كنت تدافع عن وجهة نظرك تجاه نقطة ما. فهذه الأمور تعطي صورة ليست جيدة عن شخصيتك.
9. تذكر بأنك تستطيع أن تقبل أو ترفض وجهة نظر الطرف الاخر و لكن بأسلوب لطيف و مهذب والاهم من ذلك من مبدأ علمي.
10. في حالة لم تقم بالاجابة على بعض الأسئلة لا تقلق فهذا أمر طبيعي وكلنا مررنا بهذه الحالة.
11. تذكر من الطبيعي أن تقول لا أعلم.
12.عند الإنتهاء من عرضك من اللائق شكر الحضور على إستماعهم.
13. خلال عرضك لبحثك الخاص بك تذكر بأنك لست في حالة حرب بمعنى كن هادئا
14.من المهم أن تكون أنيقا في حضورك وملبسك و اختيارك للكلمات.
15.لا تأخذ الاسئلة الصعبة الموجهة لك على محمل شخصي.
16.أحضر بوقت كافي لمكان العرض لكي تتأكد من الأدوات الموجوده هناك تعمل بشكل صحيح.
17. توقع الجيد و ألاسوء خلال النقاش.
18. دوما أنصح بأن تتمرن على القاء بحثك امام زملائك قبل عرضه على المشرف الدراسي و أعضاء هيئة التدريس.
19. هذه النصائح ليست خاصة للطلاب فقط بل صالحة لكل شخص لديه عرض أمام الاخرين.
20. في حال كان العرض اونلاين فبعض النقاط قد لا تنطبق و لكن من الهم في هذه الحالة مراعاة ما يلي:
– اختيار المكان الهاديء
– التأكد من النت
– وضوح الصوت
– تجربة البرنامج ومعرفة كيفية التعامل معه قبل بدء العرض
21. العرض والحضور الجيد لا يأتي الا بتوفيق من الله ومن ثم الاخذ بالاسباب مثل
– التحضير الجيد
– الالمام الكامل بما تعرض
– عدم وجود أخطاء بسيطة تؤثر على العرض مثل الاخطاء الاملائية او اللغوية.
– من الجيد ان تعرض بحثك على مشرفك قبل وقت العرض الرسمي
خريج تقنية معلومات قسم الشبكات في كلية التقنية العليا بإمتياز مع مرتبة الشرف و موظف تقنية معلومات في مجال التعليم. حضرت عدة دورات لتحسين وتطوير المهارات اللازمة في مجال عملي وفي دراستي وغيرها من الدورات الشخصية لتطوير الذات.
من هواياتي تصميم المواقع الإلكترونية وادارتها و الدعم الفني.