
Apr 7, 2016 | Learn and Teach, windows
Using SCCM 2012 R2 to Deploy Windows 7
copied from the source Here
Deploying Windows 7 Using SCCM 2012 R2 n this post we will see the steps for deploying windows 7 using SCCM 2012 R2. In my previous post we saw the steps to capture a reference operating system (Windows 7) using SCCM 2012 R2. Note that this post is different from the one which shows the steps to build and capture the operating systems using SCCM 2012, we will not be using build and capture approach here rather we will capture a reference operating system, i.e. capture windows 7 using SCCM 2012 R2 and we will deploy the same using SCCM 2012 R2 in the this post. We will be creating a device collection first and then we will import the computer information to this device collection. One the computer is added to the collection we will create task sequence, configure it and deploy it the device collection.
Deploying Windows 7 Using SCCM 2012 R2
So in my previous post we had successfully captured the windows 7 operating system and now we will be deploying the captured image using SCCM 2012 R2. To do that lets create a blank virtual machine without any operating system installed on it. Note down the MAC address of the virtual machine (the same applies to a physical box too).

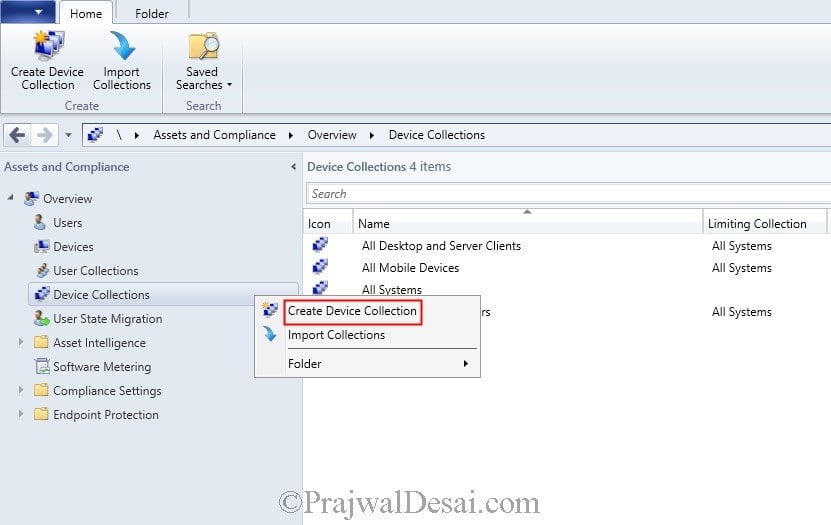
Lets create a new device collection. This is to add the computer to this collection for which the operating system is going to be deployed. Right click on Device Collections, click Create Device Collection.
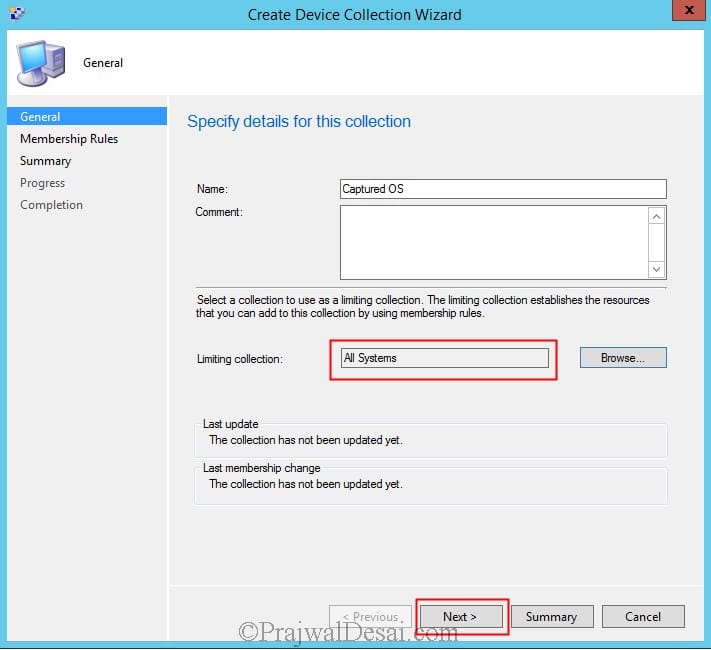
Provide the name for this collection , set the Limiting collection to All Systems. Click Next.
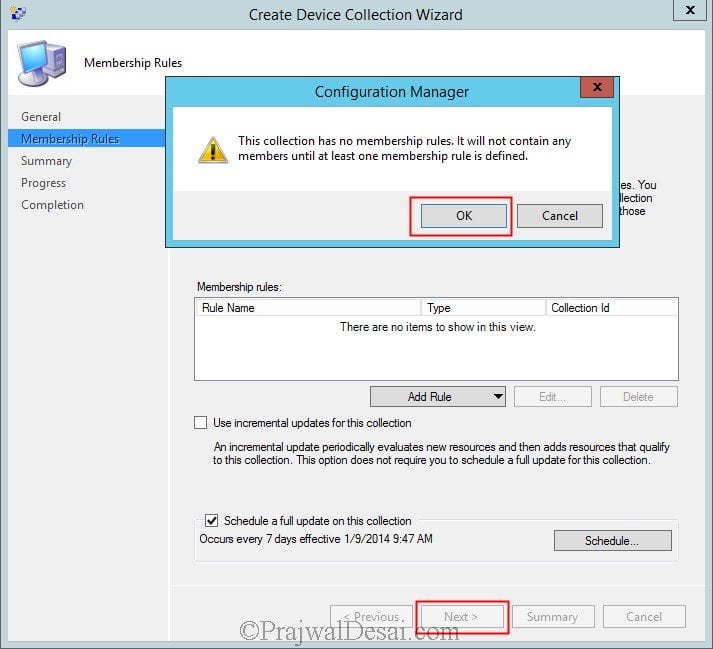
We will not define any rules for this collection. Click on Next. Since we will be creating a collection without defining any rule, the wizard prompts that the collection will not contain any members until we define a membership rule. On the pop up box click on OK.
[ads1]
The device collection has been created. Now we will import the computer information to add the new computer object to this collection. Click on Devices, click on Import Computer Information.

Choose Import single computer and click Next.
[ads2]
Apr 7, 2016 | capture, Learn and Teach, sccm, server 2012, Take an image, win ser 2012, windows, windows 7
Take an image for window 7 by sccm
Capture Windows 7 Using SCCM 2012 R2
copied from the source Here
In this post we will see the steps to capture windows 7 using SCCM 2012 R2. This post is different from the one which shows the steps to build and capture the operating systems using SCCM 2012 R2. We will not be using build and capture approach here rather we will capture a reference operating system, i.e. capture windows 7 using SCCM 2012 R2 and we will also see how to deploy the same using SCCM 2012 R2 in the next post. Please note that the computer operating system that we are going to capture should not be part of domain, else the sysprep fails during this process. So you capture a computer that has windows 7 installed (along with softwares like office, adobe reader etc) which is not joined to the domain. At any point of time you can check the step by step guide for SCCM 2012 R2 which contains all the posts related to SCCM 2012 R2.
Capture Windows 7 Using SCCM 2012 R2
We will first create a task sequence media and create a capture media which is in saved .iso format. This .iso file contains the necessary files and instructions to capture a reference operating system. The same .iso file captures the operating system and stores the captured OS in .wim format. Once we get the .wim file we will import the file to SCCM 2012 R2 and we can use this .wim to deploy this OS to another computer either by using SCCM or WDS.
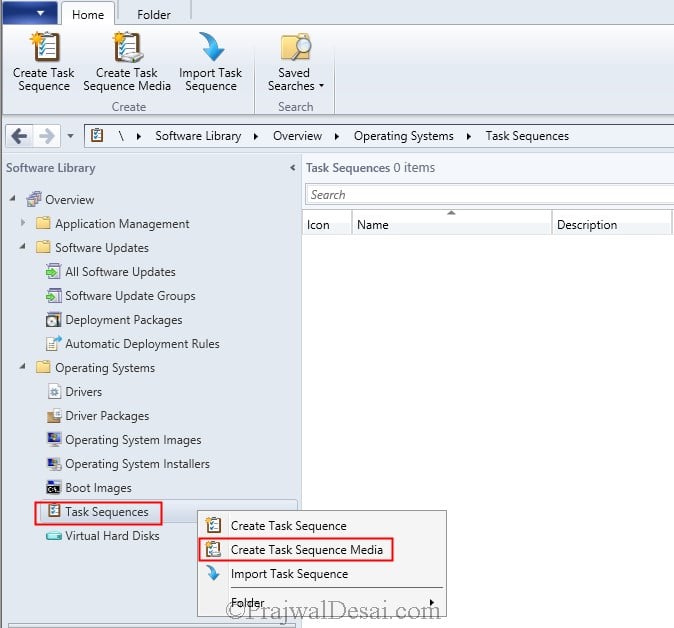
The first step involves creating a capture media which is in .iso file. Launch the ConfigMgr console, click on Software Library, expand Overview, expand Operating Systems, right click Task Sequences and click on Create Task Sequence Media.
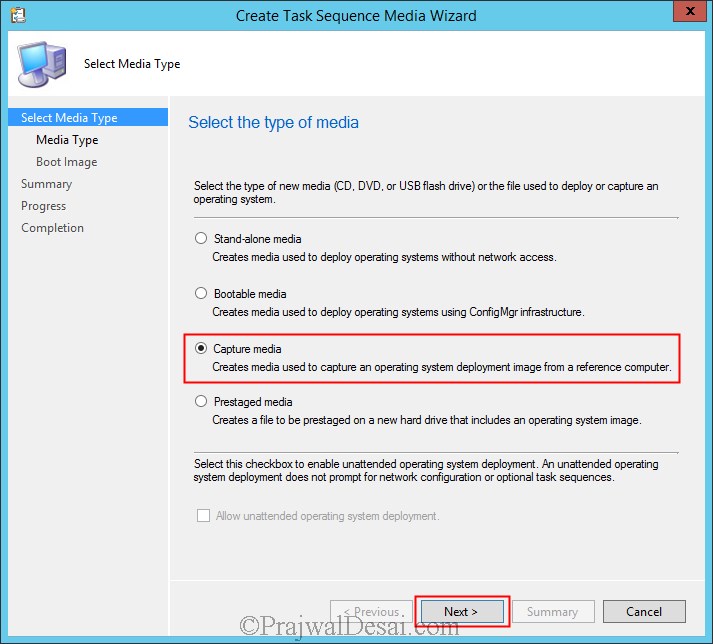
Type of Media – Select the type of media as Capture Media. Click Next.
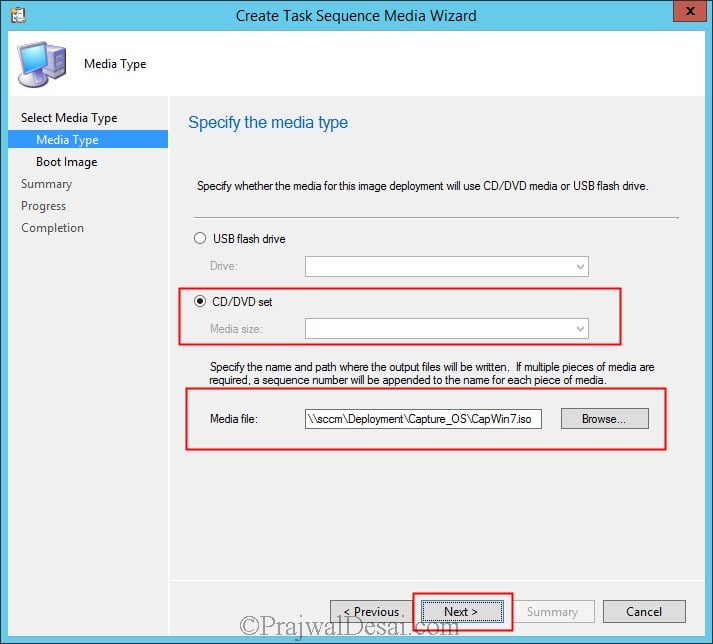
Media Type – You can select either USB flash drive or CD/DVD. I have tried using USB flash drive and even that works. In this example we will choose CD/DVD, and we will store the media file in one of the shared location on SCCM server. You can choose to store the capture media on any shared location, it may not be necessarily SCCM server. One important thing here you must save the capture media with .isoextension. Click on Next.
[ads1]
Selecting Boot Image – This is very important step. Select the Boot Image by clicking on Browse. Select Boot Image (x64) and for DP click on Browse and select the desired DP. Click Next.
NOTE – You must first enable the command support on both the boot images(x64 and x86) and then distribute it to the distribution point. To enable the command support right click on each of the boot image, click on properties and under Customization tab check the box Enable Command Support (testing only). Enable command support for both the boot images. By default the boot images are not distributed to DP and if you don’t distribute the boot images you will not be able to select the DP in the below step. To distribute the boot images to DP, right click on each boot image and click Distribute Content.

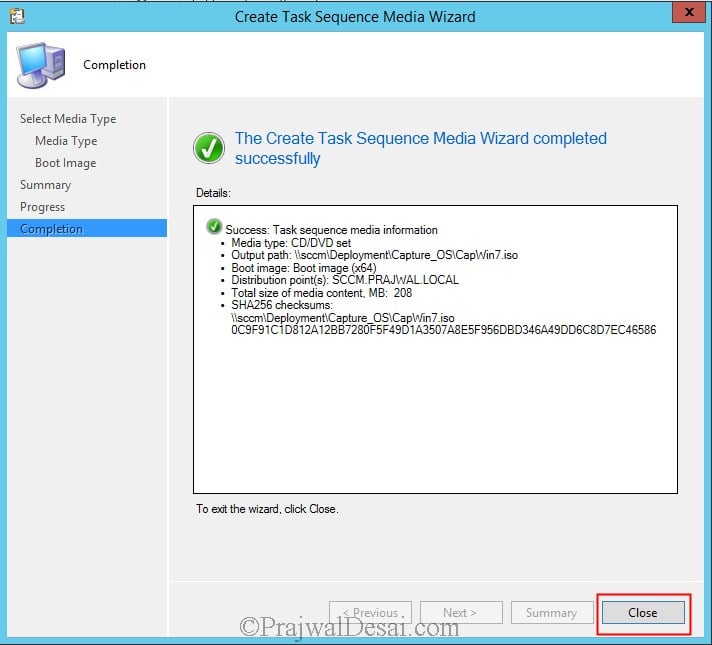
The capture media has been created by the wizard. Click on Close.
[ads2]
After creating the capture media we will now mount the capture media (.iso file) on the windows 7 machine and run the image capture wizard. In this example I have a virtual machine which has been installed with windows 7 professional SP1 x64 OS and we will be capturing this computer OS image. If its a physical machine you can burn the capture media .iso to a CD and insert it in the CD tray and run the image capture wizard. If its a virtual machine you can mount the .iso file by providing the path where the capture media .iso file exists. On a virtual machine when you mount the .iso file by providing a shared location, it asks for a user account to access the .iso file, provide a domain user account which has enough permissions to access the folder where the .iso file exists.
Once you mount the capture media on a windows 7 machine you will see the autorun box. Click Run TSMBAutorun.exe, you will see the Image Capture Wizard. Click on Next.

[ads1]
Image Destination – Provide a folder path where the captured image should be stored. The name of the captured image should have .wim as extension. Also provide a user account that has enough permissions to store the captured file to the shared folder. Click Next.
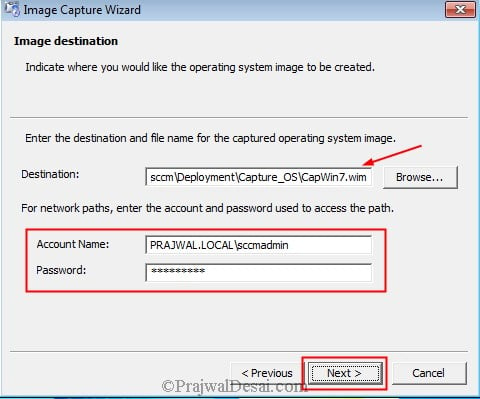
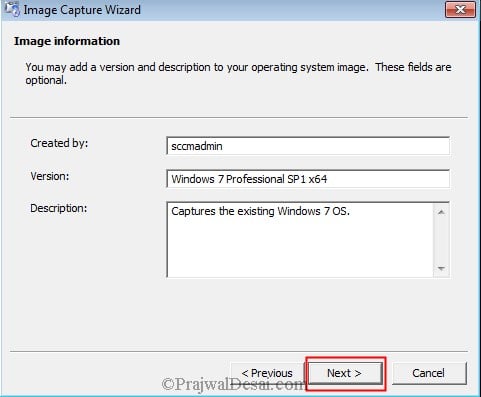
Image Information – Provide the image information such as Created by, Version and Description. Click on Next.
Click on Finish to complete the Image Capture Wizard. Note that we have just run the image capture wizard, in the next step sysprep captures the OS.

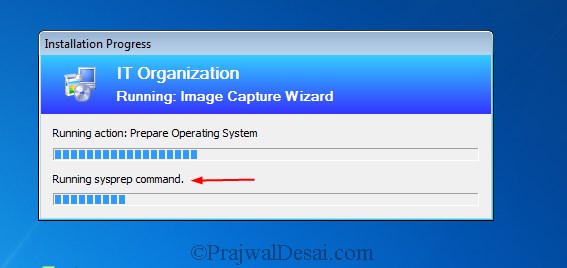
In the below screenshot we can see that the sysprep command is running. Wait for the computer to restart automatically where the actual capture process begins.
The computer restarts and we see that the wizard now starts capturing volume and the OS. This process took around 25 minutes to complete in my lab setup.

Alright, we now see that the windows 7 OS image has been captured and saved to the destination folder. Click on OK. The computer now restarts and enters Out of Box experience (OOBE).

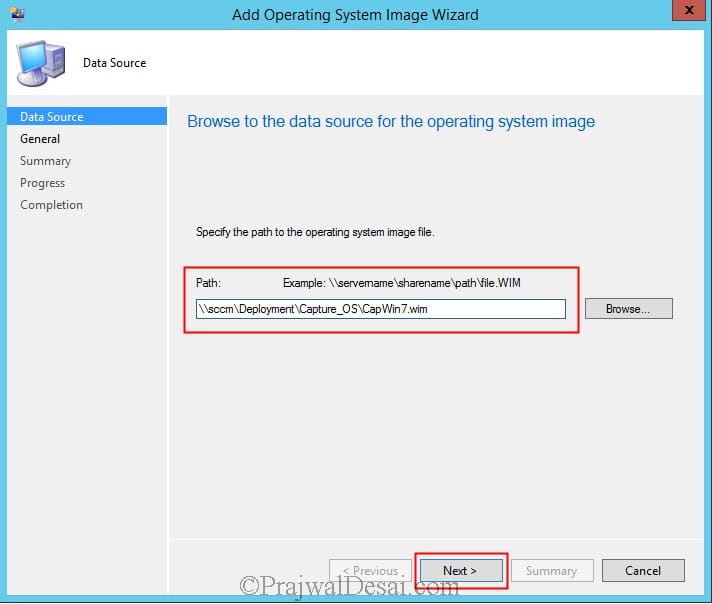
Once we have got the .wim file, we can import the .wim as operating system image in SCCM 2012 R2. To import the operating system image, right click Operating System Images, click on Add Operating System Image. Enter the path where the captured .wim file is present. Click on Next.
The name and version is picked up automatically, click on Next.

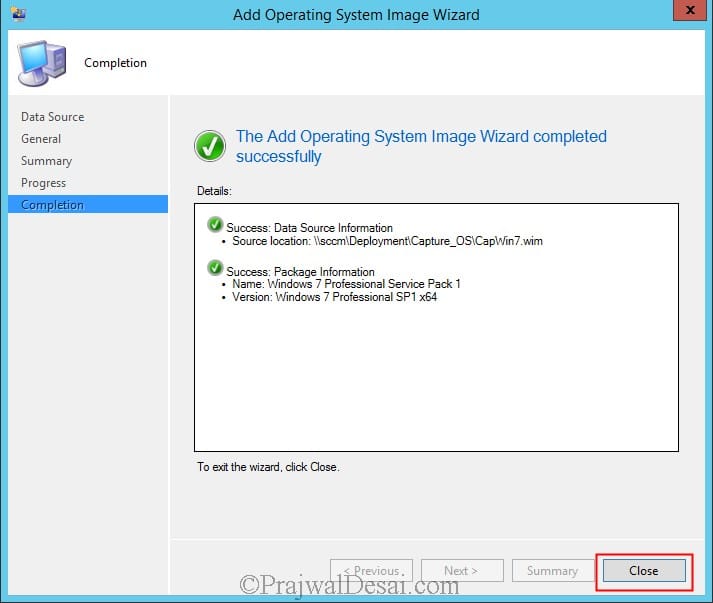
The operating system image has been imported successfully. Click on Close.
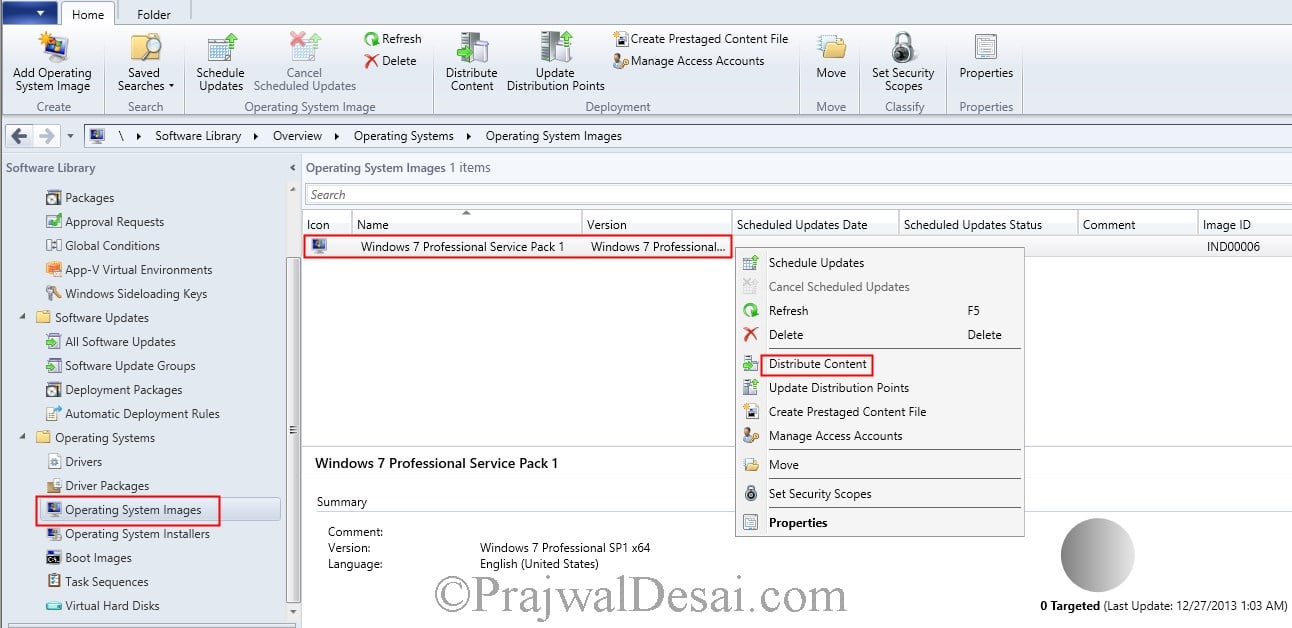
After importing the image the next step is to distribute the image to the DP. Right click on the windows 7 image and click on Distribute Content.
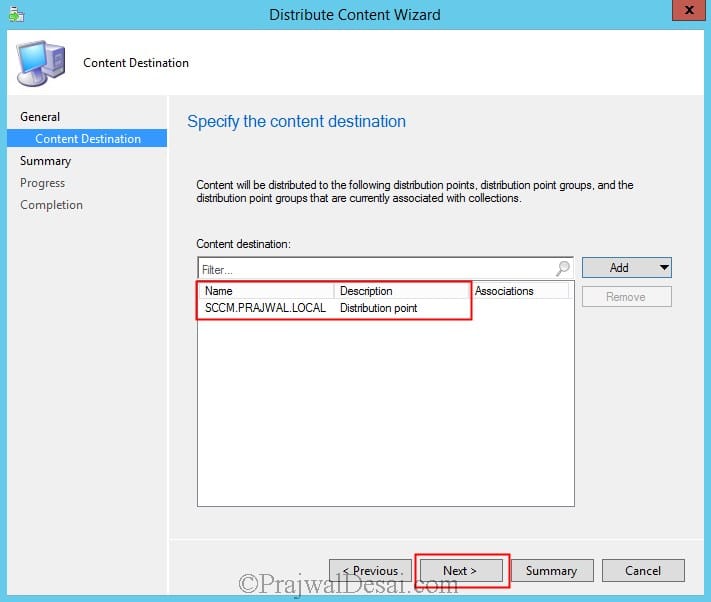
Add the DP and click Next.
The image file has been distributed to the DP. Click on Close. Wait for sometime while the DP updates the content, check the content status and you must see a green circle which means that content is now available with DP.

Apr 7, 2016 | Uncategorized
Using SCCM 2012 R2 to Deploy Windows 7
copied from the source Here
Deploying Windows 7 Using SCCM 2012 R2 n this post we will see the steps for deploying windows 7 using SCCM 2012 R2. In my previous post we saw the steps to capture a reference operating system (Windows 7) using SCCM 2012 R2. Note that this post is different from the one which shows the steps to build and capture the operating systems using SCCM 2012, we will not be using build and capture approach here rather we will capture a reference operating system, i.e. capture windows 7 using SCCM 2012 R2 and we will deploy the same using SCCM 2012 R2 in the this post. We will be creating a device collection first and then we will import the computer information to this device collection. One the computer is added to the collection we will create task sequence, configure it and deploy it the device collection.
Deploying Windows 7 Using SCCM 2012 R2
So in my previous post we had successfully captured the windows 7 operating system and now we will be deploying the captured image using SCCM 2012 R2. To do that lets create a blank virtual machine without any operating system installed on it. Note down the MAC address of the virtual machine (the same applies to a physical box too).
Lets create a new device collection. This is to add the computer to this collection for which the operating system is going to be deployed. Right click on Device Collections, click Create Device Collection.
Provide the name for this collection , set the Limiting collection to All Systems. Click Next.
We will not define any rules for this collection. Click on Next. Since we will be creating a collection without defining any rule, the wizard prompts that the collection will not contain any members until we define a membership rule. On the pop up box click on OK.
[ads1]
The device collection has been created. Now we will import the computer information to add the new computer object to this collection. Click on Devices, click on Import Computer Information.
Choose Import single computer and click Next.
[ads2]
Apr 7, 2016 | Uncategorized
Take an image for window 7 by sccm
Capture Windows 7 Using SCCM 2012 R2
copied from the source Here
In this post we will see the steps to capture windows 7 using SCCM 2012 R2. This post is different from the one which shows the steps to build and capture the operating systems using SCCM 2012 R2. We will not be using build and capture approach here rather we will capture a reference operating system, i.e. capture windows 7 using SCCM 2012 R2 and we will also see how to deploy the same using SCCM 2012 R2 in the next post. Please note that the computer operating system that we are going to capture should not be part of domain, else the sysprep fails during this process. So you capture a computer that has windows 7 installed (along with softwares like office, adobe reader etc) which is not joined to the domain. At any point of time you can check the step by step guide for SCCM 2012 R2 which contains all the posts related to SCCM 2012 R2.
Capture Windows 7 Using SCCM 2012 R2
We will first create a task sequence media and create a capture media which is in saved .iso format. This .iso file contains the necessary files and instructions to capture a reference operating system. The same .iso file captures the operating system and stores the captured OS in .wim format. Once we get the .wim file we will import the file to SCCM 2012 R2 and we can use this .wim to deploy this OS to another computer either by using SCCM or WDS.
The first step involves creating a capture media which is in .iso file. Launch the ConfigMgr console, click on Software Library, expand Overview, expand Operating Systems, right click Task Sequences and click on Create Task Sequence Media.
Type of Media – Select the type of media as Capture Media. Click Next.
Media Type – You can select either USB flash drive or CD/DVD. I have tried using USB flash drive and even that works. In this example we will choose CD/DVD, and we will store the media file in one of the shared location on SCCM server. You can choose to store the capture media on any shared location, it may not be necessarily SCCM server. One important thing here you must save the capture media with .isoextension. Click on Next.
[ads1]
Selecting Boot Image – This is very important step. Select the Boot Image by clicking on Browse. Select Boot Image (x64) and for DP click on Browse and select the desired DP. Click Next.
NOTE – You must first enable the command support on both the boot images(x64 and x86) and then distribute it to the distribution point. To enable the command support right click on each of the boot image, click on properties and under Customization tab check the box Enable Command Support (testing only). Enable command support for both the boot images. By default the boot images are not distributed to DP and if you don’t distribute the boot images you will not be able to select the DP in the below step. To distribute the boot images to DP, right click on each boot image and click Distribute Content.
The capture media has been created by the wizard. Click on Close.
[ads2]
After creating the capture media we will now mount the capture media (.iso file) on the windows 7 machine and run the image capture wizard. In this example I have a virtual machine which has been installed with windows 7 professional SP1 x64 OS and we will be capturing this computer OS image. If its a physical machine you can burn the capture media .iso to a CD and insert it in the CD tray and run the image capture wizard. If its a virtual machine you can mount the .iso file by providing the path where the capture media .iso file exists. On a virtual machine when you mount the .iso file by providing a shared location, it asks for a user account to access the .iso file, provide a domain user account which has enough permissions to access the folder where the .iso file exists.
Once you mount the capture media on a windows 7 machine you will see the autorun box. Click Run TSMBAutorun.exe, you will see the Image Capture Wizard. Click on Next.
[ads1]
Image Destination – Provide a folder path where the captured image should be stored. The name of the captured image should have .wim as extension. Also provide a user account that has enough permissions to store the captured file to the shared folder. Click Next.
Image Information – Provide the image information such as Created by, Version and Description. Click on Next.
Click on Finish to complete the Image Capture Wizard. Note that we have just run the image capture wizard, in the next step sysprep captures the OS.
In the below screenshot we can see that the sysprep command is running. Wait for the computer to restart automatically where the actual capture process begins.
The computer restarts and we see that the wizard now starts capturing volume and the OS. This process took around 25 minutes to complete in my lab setup.
Alright, we now see that the windows 7 OS image has been captured and saved to the destination folder. Click on OK. The computer now restarts and enters Out of Box experience (OOBE).
Once we have got the .wim file, we can import the .wim as operating system image in SCCM 2012 R2. To import the operating system image, right click Operating System Images, click on Add Operating System Image. Enter the path where the captured .wim file is present. Click on Next.
The name and version is picked up automatically, click on Next.
The operating system image has been imported successfully. Click on Close.
After importing the image the next step is to distribute the image to the DP. Right click on the windows 7 image and click on Distribute Content.
Add the DP and click Next.
The image file has been distributed to the DP. Click on Close. Wait for sometime while the DP updates the content, check the content status and you must see a green circle which means that content is now available with DP.
