

SHELL SCRIPTING
PART 1

INTRODUCTION
- A shell is the interface between us and the kernel.And in this tutorial we are going to learn shell scripting .
- First we start with the basic commands.And this tutorial is the basic tutorial , soon we will cover the advanced shell scripting .
- And the operating system we use is ” Kali-Linux”.
- Now go through with it and practise as much as you can .
SIMPLE COMMANDS
- whoami
- pwd

SYSTEM DATE AND CALENDER
- To see the calender in linux we use the cal command .
- As you enter the cal command , it will show you the current month calender.
- See the below image for more details –

2013 CALENDER
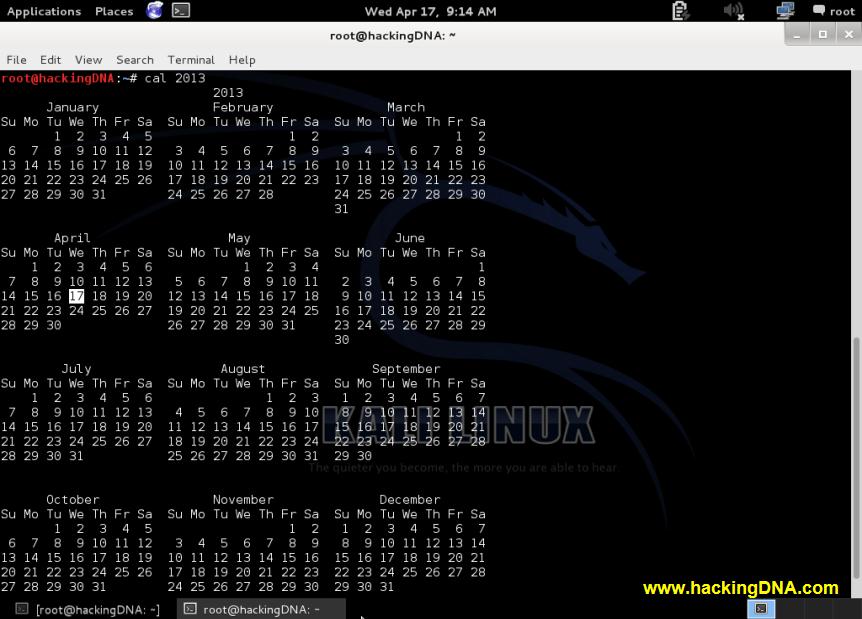
- Now if you are interested to view the 2013 calender , then enter the commands as shown below.
- Command : cal 2013
- See the below image for more details –
CREATING FILES AND DIRECTORIES
TOUCH COMMAND
- Using touch command you can create the empty files in linux .
- Also you can create more than 1 files together .
- These are the empty files but you can also put text inside it using different text editors like vim , nano etc .
- Example : See the below image i have created 3 empty files together using touch command .

CREATING DIRECTORIES
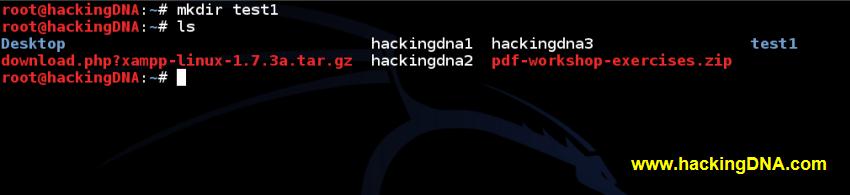
- To create directory , we have to use the mkdir command .
- Syntax : mkdir < directory name >
- Example : See the below example for more details –
CHANGING DIRECTORY
- To change directory you can simply use the ‘cd’ command .
- See the below image for more details –

CREATING TEXT FILE USING CAT COMMAND
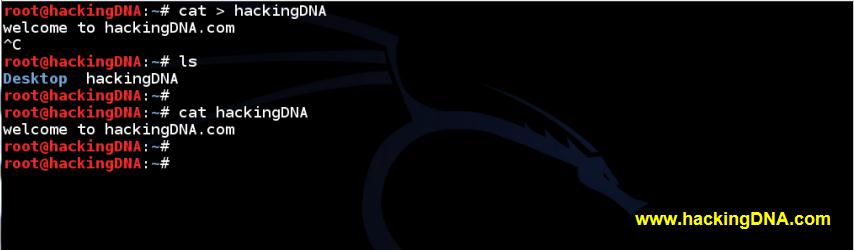
- To create file use the command cat > filename
- Then enter the text .
- To terminate press ctrl+d.
- See the below image for more details –
TO VIEW FILES
- To view files you have to use ‘ < ‘ (less than ) sign as shown in the below example .
- Example : cat < hackingDNA
- Here hackingDNA is the filename .
- See the below image for more details –

MERGE FILES
- Merge files means joining two files together and put it into one single file .
- Example : In the below example you can see two files :
- hackingDNA
- test
- Then we put these two files into 1 single file i.e merge.
- And at the last we view the merge file using ‘cat < merge’ command .
- See the below image for more details –

RENAMING AND DELETE FILES AND DIRECTORIES
RENAME
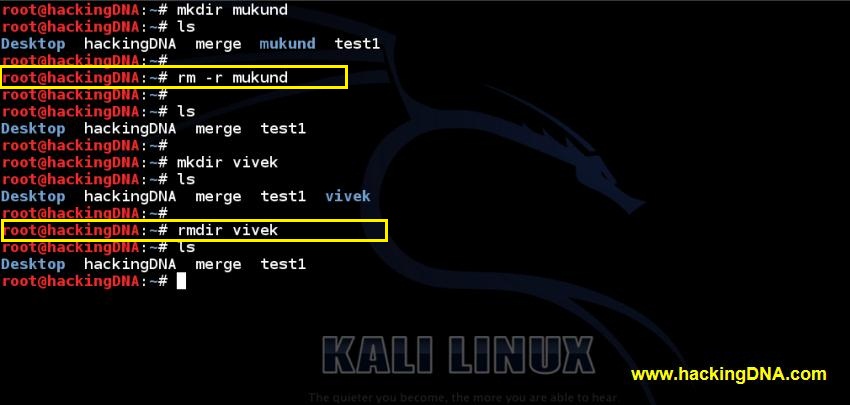
- To rename file mv command is used .
- Syntax : mv filename newfilename
- Example : mv test test1
- See the below image for more details –

CREATING AND DELETING DIRECTORIES
COPY FILE INTO MUKUND DIRECTORY

LINK BETWEEN FILES : hardlink example
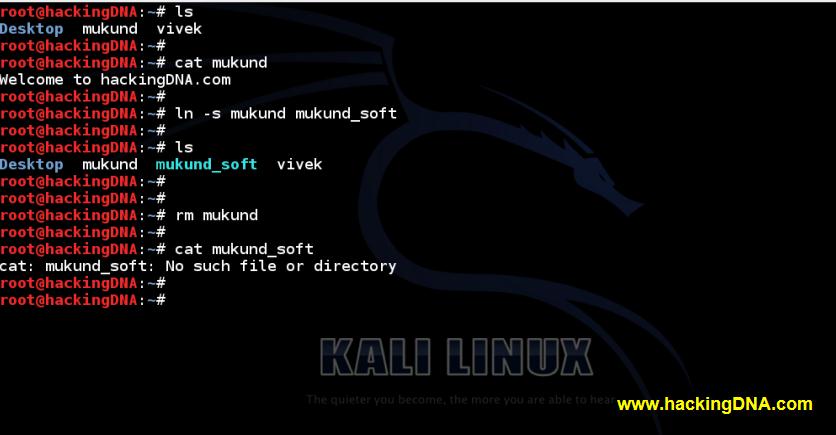
SOFTLINK EXAMPLE
- In this example , i use ” ln -s ” to create a soft link .And also i link mukund to the mukund_soft .
- When we use the ls command , you will observe the color of the soft link file , it’s different from others.
- So now when i remove the mukund file and then try to access the mukund_soft file , you will observe you cannot see that file because you have deleted the hardlink (i.e mukund ).
FILE PERMISSION
CREATING A SAMPLE FILE


USING OF ” ls “
VIEW FILES AND DIRECTORY WITHOUT PERMISSION

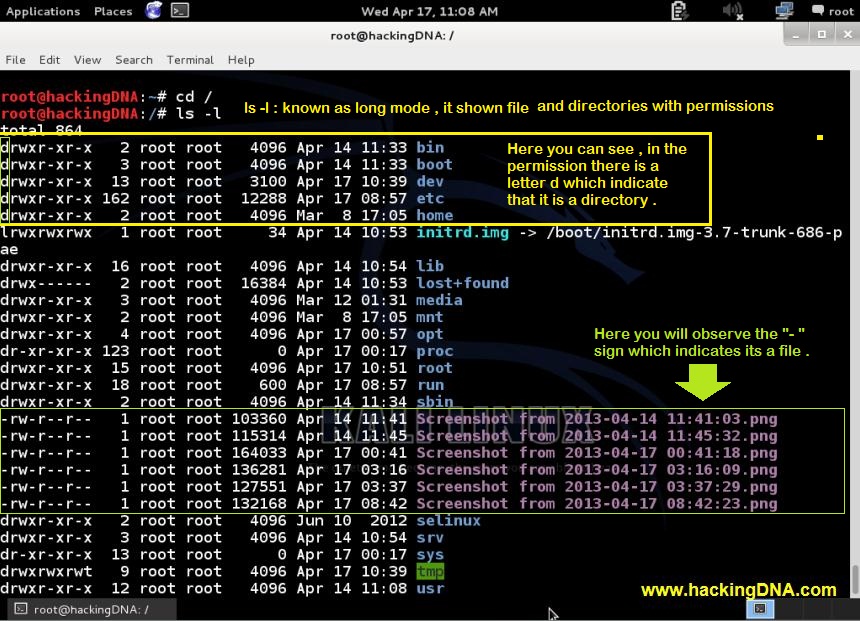
LONG MODE ( ls -l )
DISPLAY ALL THE HIDDEN FILES (ls -a)

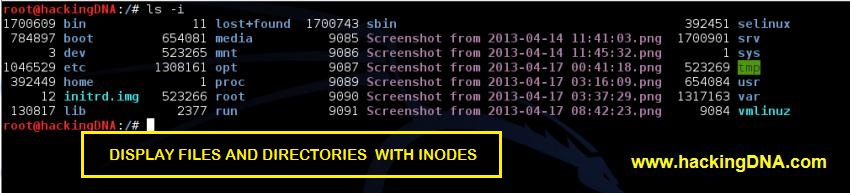
DISPLAY ALL WITH INODE (ls -i )
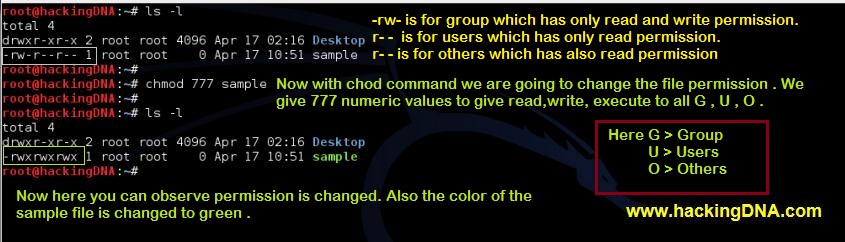
CHANGE FILE PERMISSION WITH CHMOD
- Giving numeric permission is the easiest method .
- Numeric permission : 4 is for Read , 2 is for write and 1 is for execute .
- So for example : If you want to give rwx permission to group , users and other , you have to enter the numeric value 777 as shown in the below image .
- See the below example for more details –
OTHER EXAMPLES

UNAME
To see the version of kernel , name of machine , OS etc .

- SOON PART -2 will be upload ed, till then practise these commands and bring some perfection in your command line .
- That help you a lot in many situation .