How to Add and Remove Authors in an Office Document

How to Add and Remove Authors in an Office Document

How to Add and Remove Authors in an Office Document

00_lead_image_adding_author

By default, the author of a document is set to the user name you entered when you installed Word. However, you can change the user name, thus changing the main author, as well as add authors to or remove authors from a document.

NOTE: We used Word 2013 to illustrate this feature.

To add an author to a document, click the “File” tab.

01_clicking_file_tab

Make sure the “Info” screen is the active backstage screen. In the “Related People” section of the “Info” screen, notice that the user name from the “Summary” information is listed as the author. To add another author, click “Add an author” under the user name.

02_clicking_add_an_author

Enter the name of the author you want to add in the edit box. If you have any contacts in your address book, names matching what you are typing display in a popup menu. If the person’s name is available, you can choose it from the list.

03_entering_author_name

To finish adding the author, click on any free space on the “Info” screen outside of the author edit box. The additional author displays in the “Related People” section.

04_author_added

You can also add authors by editing the “Author” property in the “Summary” information. Click the “Properties” button on the “Info” screen and select “Advanced Properties” from the drop-down menu.

05_selecting_advanced_properties

On the “Summary” tab of the dialog box that displays, notice that the author you added displays in the “Author” edit box. You can add additional authors in this edit box, putting a semicolon between each author’s name.

06_author_added_on_summary_tab

To remove an author on the “Info” screen, right-click on the author’s name and select “Remove Person” from the popup menu.

07_selecting_remove_person

You can also use the “Document Panel” to add and remove authors. Click the “Properties” button on the “Info” screen and select “Show Document Panel” from the drop-down menu.

08_selecting_show_document_panel

RELATED ARTICLE

How to Set the Advanced Properties of a Word Document
We recently showed you how to set the user information in Word. Word also stores several additional advanced properties related… [Read Article]

The “Document Panel” opens above the currently open document. Add and remove authors using the “Author” edit box on the panel the same way we did on the “Summary” tab on the “Advanced Properties” dialog box earlier in this article. Remember to put semicolons between the author names.

09_adding_author_in_document_panel

You can also add and remove authors in the same manner in Excel and PowerPoint.

EIGRP 101

1. Starting the routing process

R(config)# router eigrp AS-NUMBER

! AS Number mast match between neighbors

R(config-router)# network NETWORK-ADDR [WILDCARD]

!If no wildcard is specified, the network is considered classful

  • EIGRP will advertise routes learned by the EIGRP process and all routes that appear directly connected on the interfaces that are matched by the network command. These include static routes that point to an interface and that are matched by a network command. These routes are considered directly connected and are redistributed as internal routes.
  • secondary IP addresses are not advertised when using the network command. They can only be redistributed into EIGRP
  • With Split Horizon enabled(default), it will not advertise a route back on the outgoing interface of that route.
  • Routes that don’t make it into the routing table are not advertised

To see the interfaces that run EIGRP use:

R3#sh ip eigrp interfaces

IP-EIGRP interfaces for process 345

                        Xmit Queue   Mean   Pacing Time   Multicast    Pending

Interface        Peers  Un/Reliable  SRTT   Un/Reliable   Flow Timer   Routes

Fa0/0              1        0/0        71       0/2          384           0

Se1/0.301          0        0/0         0       0/1            0           0

Lo0                0        0/0         0       0/1            0           0

1.1 Split Horizon

When Split Horizon is enabled on an interface, Update and Query packets are not sent for destinations which have this interface as outgoing. This could be a problem in Hub and Spoke Frame Relay topologies. Use this command to disable Split Horizon:

R(config-if)# no ip split-horizon eigrp AS-NUMBER

Make sure you know the difference between the RIP and the EIGRP command that disables Split Horizon:

! EIGRP:

R(config-if)# no ip split-horizon eigrp AS-NUMBER

! RIP:

R(config-if)# no ip split-horizon

Some IOS implementations disable split-horizon on interface where “encapsulation frame-relay” is configured.

1.2 Passive interfaces

When defining a passive interface, the EIGRP process will advertise the network but will not send or accept EIGRP messages on the interface.

R(config-router)# passive-interface INTERFACE

This behavior is different than RIP’s, where a passive interface would still accept RIP advertisements.

You can also enable passive interfaces by default and then disable it on the interfaces where EIGRP should run:

R(config-router)# passive-interface default

R(config-router)# no passive-interface INTERFACE

2. Neighbors

When a router running EIGRP receives valid HELLOs from another router, it adds it to the neighbor list. To see the neighbors list use:

R# show ip eigrp neighbors [detail]

A HELLO message contains the AS number and the K values of the router sending the message. In order to become neighbors, two routers must share the following values:

  • K values
  • AS number
  • Primary subnet
  • Authentication

By default, when valid HELLOs are not received for an entire HOLD-TIME period, the router considers the neighbor to be down. See Timers section below.

2.1 Static Neighbors

When a neighbor is defined, all communication with it is done using unicast packets:

R(config-router)# neighbor NEIGH-ADDR OUT-INTERFACE

Unlike RIP, this will disable multicast EIGRP on the interface, so no dynamic neighbors will be discovered.
This config should be used on Frame Relay Hub & Spoke networks when two spokes should become neighbors.

2.2 Authentication

EIGRP supports only MD5 authentication of EIGRP messages:

  1. Define the key chain

    (config)# key chain KEY-CHAIN

    R(config-keychain)# key KEY-NUMBER

    R(config-keychain-key)# key-string KEY-NAME

    ! Optionally, define the an accept-lifetime

    R(config-keychain-key)# accept-lifetime start-time {infinte|END-TIME|duration SEC}

    ! Optionally, define the an send-lifetime

    R(config-keychain-key)# send-lifetime start-time {infinte|END-TIME|duration SEC}

  2. Apply it on the interface

    R(config-if)# ip authentication mode eigrp AS-NUMBER md5

    ! sets the authentication to MD5

    R(config-if)# ip authentication key-chain eigrp AS-NUMBER KEY-CHAIN

When sending EIGRP messages, the router uses the lowest key number among all current valid keys. When receiving EIGRP messages, the router checks the MD5 digest using all current valid keys. Both the key ID and the Key-string must match in order to form an adjacency.

3. Timers

3.1 Hello interval

It specifies how often a router sends EIGRP HELLO packates. The default timer is:

  • 5 seconds for almost all interfaces
  • 60 seconds for Frame Relay physical interfaces or multipoint subinterfaces with a bandwidth lower than T1(1544kbps)

The default value can be changed using:

R(config-if)# ip hello-interval eigrp AS-NUMBER SEC

To verify, use:

R# show ip eigrp interface INTERFACE detail

IP-EIGRP interfaces for process 145

                        Xmit Queue   Mean   Pacing Time   Multicast    Pending

Interface        Peers  Un/Reliable  SRTT   Un/Reliable   Flow Timer   Routes

Fa0/0              1        0/0        48       0/2          240           0

  Hello interval is 5 sec

  Next xmit serial <none>

  Un/reliable mcasts: 0/1  Un/reliable ucasts: 2/4

  Mcast exceptions: 1  CR packets: 1  ACKs suppressed: 0

  Retransmissions sent: 1  Out-of-sequence rcvd: 0

  Authentication mode is not set

  Use multicast

3.2 Hold Time

If a router does not receive Hello Messages for an entire Hold Time, the router considers the neighbor to have failed. The default timer is 3xHELLO-INTERVAL:

  • 15 seconds for almost all interfaces
  • 180 seconds for Frame Relay physical interfaces or multipoint subinterfaces with a bandwidth lower than T1(1544kbps)

The default value can be changed using:

R(config-if)# ip hold-time eigrp AS-NUMBER SEC

3.3 Active Timer

When the router sends a Query, it will wait the time specified in the active timer for a replies from its neighbors. If no reply is received in the specified interval, the route is declared dead:

R(config-router)# timers active-time {ACTIVE-TIME|disabled}

! Default: 180 sec

See Going Active for details.

4. Packets

EGIRP uses IP protocol 88 (RTP=Reliable Transport Protocol). EIGRP uses both unicast and mulitcast packets. Except for HELLO and ACK packets, the other packets require ACK from the neighbors. A router would retry 16 times to send a packet before neighbor relationship is reset. All packets are sourced from the primary IP address of the interface.
HELLO packets are sent every HELLO-INTERVAL as multicasts to 224.0.0.10 or as unicasts to each static neighbor. They contain the K values used by the router as well as the HOLD-TIME – how much time to wait for a HELLO, before resetting adjacency. EIGRP packets are sourced from the primary address of each interface.
UPDATE packets are sent as unicast when neighbors are discovered initially and as multicasts whne updates are genertated by network changes. For each route, a packet contains the prefix, prefix length, hop count, and components of the advertised metric (Bandwidth, Load, Delay, Reliability, MTU). These packets are sent only when changes occur and only to the routers that need the update. EIGRP doesn’t use periodic updates. Update packets need to be acknowledged.
QUERY packets are used when “going active” – see below. QUERY packets are sent as multicast and need to be ACKed.
REPLY packets are used to reply to QUERY packets. They are sent as unicasts and need to be ACKed.
ACK packets are sent as an acknowledgement to Query and Reply messages. ACK are always unicasts, and EIGRP expectes one ACK from each neighbor.
GOODBYE packets are sent when the EIGRP process is shut down or restarted to inform the neighbors.

If there are many changes in the network, EIGRP messages can overwhelm a link. Use this command to limit the bandwidth used by EIGRP Updates per interface:

R(config-if)#ip bandwidth-percent eigrp AS-NUMBER BW-PERCENT

!default: BW-PERCENT = 50

5. EIGRP metric

See here for information about EIGRP metric and offset lists.

6. EIGRP Administrative Distance

By default, EIGRP AD is 90 for internal routes, 170 for external routes and 5 for summary routes. The default can be changed using:

R(config-router)# distance eigrp INTERNAL-AD EXTERNAL-AD

The AD can be changed per routing source and destination using:

R(config-router)# distance AD DESTINATION-IP WILDCARD-MASK [ACL]

7. Load Balancing

In addition to Equal Cost Load Balancing, EIGRP can perform Unequal cost load balancing. To enable this, the variance command must be used.
When setting variance, all routes that have a metric lower then the FD * VARIANCE are added to the routing table and traffic can be load balanced between them.

R(config-router)# variance VAR

8. Distribute Lists

Used to filter updates going out or coming into the EIGRP process

! Using ACLs

R(config-router)# distribute-list ACL {in|out} [INTERFACE]

! Using Prefix-list

R(config-rotuer)# distribute-list prefix PREFIX-LIST {in|out} [INTERFACE]

! Using gateway - filter based on the source of the update:

R(config-router)# distribute-list gateway PREFIX-LIST1 [prefix PREFIX-LIST2] {in|out} [INTERFACE]

! Using route maps:

R(config-router)# distribute-list route-map ROUTE-MAP {in|out} [INTERFACE]

9. Summarization

9.1 Auto Summarization

By default, EIGRP performs an auto-summarization each time it crosses a border between two different major networks. To disable this behaviour and to advertise the component routes, use:

R(config-router)# no auto-summary

The auto-summary routes appear as internal routes and the metric of the summary route is the best metric from among the summarized routes. On the router doing the summarization, a route to Null0 is added for the summarized address, so that traffic that is destined for other destinations than the component routes, but inside the same major network, is discared.

EIGRP will not auto-summarize external routes unless there is a component of the same major network that is an internal route

9.2 Manual Summarization

Manual sumamrization can be done on an interface, with no limitation of the bit boundary, using:

R(config-if)# ip summary-address eigrp AS-NUMBER NETWORK-ADDR NETWORK-MASK [AD] [leak-map LEAK-MAP]

The router will advertise the summary address instead of any component, as long as there is one component in the routing table.

By default, manual summary routes have an AD of 5 and point to Null0. Due to the low AD value, they can override other learned routes with the same prefix (like a default route). Use the concept of a floating summary route to change the default AD when defining the manual summary. Use a value of 255 to stop the summary route from getting into the routing table

Leak maps enable sending routing information for specific routes defined by a route-map, and the summary route for all other.

10. Default routes

10.1 Redistribute Static Route to 0.0.0.0 into EIGRP

R(config)# ip route 0.0.0.0 0.0.0.0 NEXT-HOP

R(config)# router eigrp AS-NUMBER

R(config-router)# redistribute static

10.2 Define a default network

By default 0.0.0.0/0 is considered the default route, but EIGRP can advertise another route as the default route as long as it is marked as the default-network

R(config)# ip default-network NETWORK-ADDR

! NETWORK-ADDR is classless

If we have the NETWORK-ADDR with its default class (A/B/C) in our routing table, then the next step is to advertise it into EIGRP. This can be done via redistribution (of connected/static routes) or the network command (provided the matched interfaces will bring the specific prefix into the EIGRP topology).
Things get ugly when the default-network is not int our routing table with the default class. Let’s take an example:
If we have a loopack address with the network 5.5.5.5/24 and we want it to become the default network, then we will have to run the following commands:

R(config)# ip default-network 5.0.0.0

R(config)# ip default-network 5.5.5.5

The second command will generate a static route in the config, that will be deleted only when the default-network is removed from the config:

R(config)#sh run | i ip route

ip route 5.0.0.0 255.0.0.0 5.5.5.5

Now we have a route pointing to the Class A network 5.0.0.0 via the next-hop 5.5.5.5. We can add the 5.0.0.0 network to EIGRP via redistribution (static) to EIGRP or add the 5.5.5.5 interface to the network list. From now on, EIGRP will advertise a route to 5.0.0.0 that is also marked as a candidate default.

10.3 Manual Summary to 0.0.0.0/0

R(config-if)# ip summary-address eigrp 0.0.0.0 0.0.0.0 [AD]

Use a lower AD not to override other default routes learned by the downstream routers.

Designing and Building with Anchor CMS

Designing and Building with Anchor CMS

Designing and Building with Anchor CMS

featured

Increasing diversity across your private blog network is always a good approach to take. Not only does it minimize your networks’ footprint, but it gives you a good experience of using other tools for building sites.

Recently I have been building a few sites using a relatively new CMS called Anchor CMS.

It’s touted as “a super-simple, lightweight blog system, made to let you just write.” and I have to say it’s actually pretty enjoyable to use.

I’m going to run through the basic steps you will need to accomplish building a rather slick looking site.

DOWNLOAD ANCHOR CMS

First of all, you will want to download Anchor CMS.

Click here to download it.

UNZIP AND UPLOAD

Next, unzip it and upload it to the root domain of your web server using your preferred FTP client (I use FileZilla – available here).

PREPARE YOUR DATABASE DETAILS

You’ll need to set up a database and username/password combo for this new site, this tutorial is all about Anchor CMS, so I’m going to skip the technical details on adding a domain to your BlueHost account, and all that other basic admin.

VISIT YOUR SITE AND FOLLOW THE INSTALLER

Once you have uploaded the unzipped folder to your domains root directory, visit your domain and you’ll see the default Anchor CMS installer.

First screen, very simple – just click on the button.
Install Anchor CMS - Step 1

Next choose your language and time zone.
Install Anchor CMS - Step 2

And then you’re going to need to enter your database details. Be careful on this step to ensure that you don’t enter any incorrect information, or you’ll have to fill out the whole form again.

Once you have entered your Database host (on BlueHost this will be ‘localhost’), username, password and database name you can click Next Step to progress the installation.
Install Anchor CMS - Step 3

You now have the chance to enter in your site title and tagline. Enter in your title and description and click on the next step button. Don’t worry – you can always change these at a later date if you need to.
Install Anchor CMS - Step 4

You’ll need to now create a user that can log into your CMS – choose a username and a strong password and click on Complete to finish the installation.
Install Anchor CMS - Step 5

My root directory on the server isn’t writeable by the web server for security reasons, so I have to manually copy and past the code that they provide into a .htaccess file. Create and save this file before continuing otherwise you’ll get a bunch of error messages.
Install Anchor CMS - Step 6

Installation Complete – You can now click on either ‘View Your Site’ which will show the following rather dull ‘Hello, World.’ default post, or you can visit your admin area (which is where the bulk of this tutorial will be!).

HOMEPAGE – AFTER INSTALL

Install Anchor CMS - Step 7

ADMIN SCREEN – AFTER INSTALL

And the Admin screen. You’ll be spending most of your time in here, and in my opinion it’s a pretty functional admin interface. Very uncluttered and easy to navigate after a while.

Install Anchor CMS - Step 8

ADMIN SCREEN FUNCTIONALITY IN ANCHOR CMS

Once in the admin screen you can see 6 menu items across the top. These are:

  1. Posts
  2. Comments
  3. Pages
  4. Categories
  5. Users
  6. Extend

I’ll run through each of these and what you can find in the sections when you visit them.

POSTS

Install Anchor CMS - Step 8.5

On the left you will see the categories. These work in just the same way as in WordPress. You can create categories and assign posts to them. Unlike WordPress you can only choose one category for a post to be in. Personally I think this is a good thing, as categories often get misused.

In the main window you will see a list of all published posts, and clicking on a post will take you to the post editor window.

There is also the option to ‘Create a new post’ by clicking on the big green, new post button.

Click on the Create a new post button to start writing a new post.

In this editor you have the ability to enter a post Title, and the body of the post. One thing to note is that Anchor CMS uses Markdown to format text. This was quite weird to use at first, but the more I used it, the more I got used to it – and actually found it pretty powerful to use. Here is the guide that I looked at most to help me come to understand Markdown:
Markdown Guide

The other fields are the same basically as in WordPress – slug is the URL slug, the description is like a snippet that some themes will display when you are looking at a list of all your posts. Status can be Published, Draft or Archived and you can choose the category that you want to assign the post to by pulling it from the category drop down. As we haven’t created any new categories yet, all posts will be in the Uncategorized category. The last field is a check box for allowing or disallowing comments. Obviously tick it if you want to allow people to comment, keep it crossed if you want to disable comments.

Once you’ve written a post, click ‘Save’ to publish it.

You can see what my post looks like here in the editor:
Install Anchor CMS - Step 9

And once when it’s published:
Install Anchor CMS - Step 10

There is no WYSWIG editor with this CMS, I personally don’t miss it either. Once you get a little bit used to using the Markdown syntax – it’s pretty slick!

The bottom section of the screen where you can enter the slug, description etc is extendable.

By that I mean some themes will have a ‘Featured Image’, you simply can extend the post interface to allow uploading of an image file which will be displayed by the theme.

I really recommend that when you download a new theme,you check out the readme.md file on GitHub which will generally show you exactly the steps required to set up variables and fields on a theme per theme basis. You’ll see exactly later the steps I have to take when installing and configuring a new theme.

COMMENTS

Install Anchor CMS - Step 11

This is where you can see all the comments on your blog. You can approve, delete, set to pending, set to spam etc. All fairly standard stuff!

PAGES

Install Anchor CMS - Step 12

These again are similar to WordPress pages. They are usually more static pages like About Us, Privacy Policy, Terms and Conditions, etc but they have the advantage that you can add them to the menu.

You can see when I create my About Us page, I chose to show it in the menu, and when looking at the front end of the site, you’ll see it linked to the About Us page.

You can also create redirects in this way, creating a page called ‘Widgets’ and redirecting it to /category/widgets to easily let people see all posts that have been put in the Widgets category.

CATEGORIES

Install Anchor CMS - Step 13

Again, just a simple category management page here. Add, Edit and Delete categories as you wish. One point to note, I haven’t found a neat way to bulk assign blog posts to categories – so set up your categories first before writing your blog posts!

USERS

Install Anchor CMS - Step 14
Once more, a simple yet functional admin screen to manage users. They can be Administrators, Editors or Users and can be set to Active or Inactive.

This screen is also where you will want to enter a biography which will be pulled out of the database and displayed at the end of your posts (if the theme supports it.). If the theme doesn’t support it, then it’s also a fairly simple task to edit the PHP template to add it.

Install Anchor CMS - Step 15

EXTEND

This is a fun bit of the site! You can play around with a bunch of settings in here. I’ll go down the list of available links and describe each one in a little more detail.

Install Anchor CMS - Step 16

CUSTOM FIELDS

If you need to add custom metadata to a post, you can now. Custom fields allow you to attach an infinite number of key/value pairs, which can then be accessed by articlecustomfield. Some of the themes use these, and you’ll need to add them manually – when I install a theme you’ll see how I do it.

CUSTOM VARIABLES

If you need to insert a variable into your posts or pages, you can do so by creating a custom variable. Once you save it in the admin area, you can then call it in your theme template. Again, some themes use this, and you’d need to set it up on a per theme basis.

SITE METADATA

This is the screen where you can edit your site name and description along with a few other functions. You can choose which page to display as your site’s home page (in case you don’t want a recent list of all your posts), you can also select which page you want to display when people click on the posts link in your menu. The slider Posts per Page will change how many posts you display on the posts page. By default I believe it is set to 7.

There are also a couple of fields to configure your commenting system, with an input box with spam keywords that will automatically flag any comments containing those words as spam.

PLUGINS

Nothing in here yet, but I assume they will be similar to WP plugins when the framework is a little more mature.

OK so there you have the basic overview of the admin screen, I’m going to quickly run through the steps that you’d be required to do in order to add a better looking theme to the site.

SET UP A NEW THEME

Visit the website anchorthemes.com and have a browse through the available themes. NOTE: not all themes on this site are available for download. You need to see which ones have a little ‘download icon’ when you hover over the image.
Visit Anchor Themes

DOWNLOAD

For demonstration purposes, I’m going to download and install the Bushwick theme.

Download this theme. or Visit the GitHub page.

When you hover over the image, you’ll see two links – One will be the download of the theme, the other will be to the GitHub page for that theme. You’ll want to visit that and read the readme, as it gives you some extra advice on what we need to do to get the theme working right!

INSTALL

Unpack the theme and upload it to your root /themes/ directory.
Install Anchor CMS - Step 17

CONFIGURE

When you view the readme file you’ll notice that it says:

Additional meta fields required:
Posts
Name: sidebar_image
Type: Image
Pages
Name: sidebar_image
Type: Image

Install Anchor CMS - Step 18

It’s very important to set these up correctly, or we won’t be able to customize the theme as it was designed to be. Lets set those up now.

In your admin area click on
– ‘Extend’, ‘Custom Fields’, ‘Create a new field’, and then choose ‘Page’, ‘Image’ and enter ‘sidebar_image’ as the unique key. Give it a label of Unique Image and then click on the Save button.

We can ignore the other fields as we don’t need to constrain the filetype or image size.
Install Anchor CMS - Step 19

Now we’ve done the custom meta data for pages, we need to do it for posts. Go through the same steps again, except for choosing ‘Posts’ instead of ‘Pages’ in the ‘Type’ field.
Install Anchor CMS - Step 20

Once you’ve saved them both, this is what your Custom Fields page should look like.
Install Anchor CMS - Step 21

ACTIVATE

Now we’re going to enable the theme ‘Bushwick’ that we previously installed on the server.

Click on
– ‘Extend’, ‘Site Metadata’ and down the bottom of the page, choose the theme you want from the drop-down.

Click Save to activate that theme.
Install Anchor CMS - Step 22

Now if we visit the site, you’ll see the theme has been updated, although because we haven’t filled in the variables that are required for the ‘Hero’ images, you’ll just see the stock images.
Install Anchor CMS - Step 23

To add our own image into the custom field, click on ‘Posts’, then edit your post.

You’ll see a new field at the bottom of the page, called Sidebar Image. This is the one that we created a few moments earlier.
Install Anchor CMS - Step 24

Click on the Cloud icon and upload an image – and then click on Save.

Be conservative with your filenames, as I don’t think there is much error handling going on here. I uploaded a file with a space in the filename, and it didn’t work properly – and there were no error messages alerting me of what was wrong.

Once you have done that, click view post to see if it has worked.

Install Anchor CMS - Step 25

This is exactly how you would upload an image for a particular post. If you wanted to do it for your homepage (and your settings currently showed all posts, rather than a particular page) then you first need to click ‘Pages’ and then ‘Posts’ (a page for posts, which exists by default) and upload any image that you want.
Install Anchor CMS - Step 26

When you view your site now, you’ll notice that the homepage has been updated to reflect the image that you just attached to the page.
Install Anchor CMS - Step 27

Congratulations, you’ve made it to the end of another pretty long article! By now you should see the basic functions of how Anchor CMS works and how adding a few sites made on this platform to your blog network will be beneficial to you.

If you are stuck on any of the stages, then feel free to add a comment to this article and I will of course try my best to help you sort out your problems.

Simultaneously edit a document with other authors

Simultaneously edit a document with other authors

Simultaneously edit a document with other authors

Source

When you collaborate with other authors to create a document, you can save time by simultaneously editing the document, instead of doing this separately. To edit the document at the same time, each author opens the file from a common location on a server.

IMPORTANT   You can simultaneously edit documents in the .docx file format that are located on Windows Live OneDrive or a server that has Microsoft SharePoint Server 2010 installed. To work with SharePoint in Office for Mac, you have to have Microsoft Office for Mac Home and Business 2011, Microsoft Office for Mac Academic 2011, or Microsoft Office for Mac Standard 2011.

With the document open on your computer, you can see who else is editing the document, who is editing a specific paragraph, and when updates from other authors are available on the server.

Simultaneously edit a document

Callout 1 
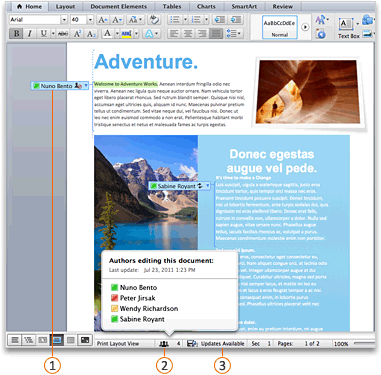
Other author currently editing the document

Callout 2 All authors currently editing the document

Callout 3  Changes from other authors available on the server

When you save your changes to the server, any updates from other authors are automatically refreshed in the document. Updates from other authors are refreshed automatically only if they don’t conflict with changes that you made. If you and another author both change the same item, then a conflict may occur. If a conflict occurs when you save the document, you are prompted to review the conflict and accept or reject the change.

Do any of the following:

Save a document to a SharePoint site

When you save a document in a library on your organization’s SharePoint site, you and your colleagues have a central location for accessing the document. You can send a link instead of sending an attachment. In this manner, you maintain just a single copy of the document. If people make revisions, they do so in the same copy. You do not have to reconcile multiple versions and copies of the document.

  1. On the File menu, point to Share, and then click Save to SharePoint.
  2. To add a SharePoint site, click Add a location  Add a location, enter the URL to the SharePoint library, and then clickAdd.NOTE   By default, many SharePoint sites have a Shared Documents library. An example of a URL that links to this library is http://fabrikam/shared%documents.
  3. In the Save As box, enter the name of your document.
  4. Under Recent Locations or Saved Locations, click the SharePoint library where you want to save the document, and then click Save.TIP   The last several documents that you have opened from a SharePoint site, either through Office for Mac, Document Connection for Mac, or your browser, are listed under Recent Locations.

Save a document to a Windows Live OneDrive

When you save a document to OneDrive, the document is stored in a central location that you can access from almost anywhere. Even if you’re away from your computer, you can work on your document whenever you have a connection to the Web. Saving a document to OneDrive also makes it easy to share the document with other people. You can send a link instead of sending an attachment. In this manner, you maintain just a single copy of the document. If people make revisions, they do so in the same copy. You do not have to reconcile multiple versions and copies of the document.

  1. On the File menu, point to Share, and then click Save to OneDrive.
  2. If this is the first time that you have tried to access OneDrive, enter your Window Live ID and Password, and then click Sign In.If you use Hotmail, Messenger, or Xbox Live, you already have a Windows Live ID. If you don’t have one, clickGet a Live ID to create a new Windows Live ID.
  3. In the Save As box, enter the name of your document.
  4. Under Personal Folders or Shared Folders, click the folder where you want to save the document, and then click Save.

Open a document that is located on a SharePoint site

  1. On the File menu, click Open URL.
  2. In the URL box, type the URL for the document that is located on SharePoint, such as http://fabrikam/shared%20documents/DocumentName.docx.NOTE   You have to use a URL for a document in a SharePoint library. You cannot use a URL for other areas of a SharePoint site, such as a SharePoint list or top-level sites.
  3. Click Open.NOTES

    • You can also open a document that is located on SharePoint from your browser. To open the document in Word, click Open in Word.
    • If you prefer to edit the file separately instead of at the same time as other authors, you can check out the file from the SharePoint site. When you check out a file, the other authors are “locked out” and can only read the file.

Open a document that is located on a Windows Live OneDrive

  1. Open your browser and sign in to Windows Live OneDrive.
  2. Find and click the document, and then click Open in Word.

See who else is editing a document

  1. On the View menu, click Print Layout.
  2. Do one of the following:

To Do this
See who is editing anywhere in the document On the status bar at the bottom of the window, click the numbered icon  Collaboration Bar presence icon.

To send a communication to someone, click his or her name, and then click a communication method – for example, send an instant message.

See who is editing a specific paragraph In the document, click the icon next to the paragraph.

Presense icon

To send a communication to someone, click his or her name, and then click a communication method – for example, send an instant message.

Save and refresh a document that has updates

When you save your changes to the server, any other authors who are editing the document are notified that updates are available. Any updates from other authors are automatically refreshed in the document at that time if they don’t conflict with your changes. You can see when other authors save changes to the server because a message that indicates that updates are available appears on the status bar at the bottom of the window.

  1. On the status bar at the bottom of the window, click Updates Available  Updates available to refresh the document with updates.
  2. On the This document was refreshed with updates by other authors dialog box, click OK.Your changes are saved to the server, and updates that were made by the other authors appear in your document as tracked changes.

    NOTES

    • Updates that were made by other authors are refreshed automatically only if they don’t conflict with your changes. If any updates conflict with your changes, you will be able to review the conflicting changes before they are saved and decide which changes to accept or reject.
    • You can also click Save  Save and refresh button  on the Standard toolbar to refresh the document with updates that were made by other authors.

Review and accept changes from other authors

If you want to track the changes made by other authors, turn on Track Changes and save the document to the server. When you are ready to review the updates from other authors, you can see what has been added to or removed from the document. By using Track Changes, you can decide whether you want to accept or reject those changes.

CAUTION   Before you can accept or reject another author’s changes in a blocked area, you must remove that author’s block. You should only remove a block when you know that all other authors are finished editing the document. Otherwise, you run the risk of creating conflicts. Using Undo  Undo button does not restore a block.

  1. Click any areas that are blocked by other authors and then click Unblock.
  2. Accept or reject changes as you would in any other document. For more information, see Use tracked changes.
  3. When you finish accepting changes, save this version of the document on the server.


سولفوا تكفون لا عاد تسكتون

سولفوا

محمد بن فطيس المري

سولفوا تكفون لا عاد تسكتون … قبل لا أهوجس وياتيني بلاي
السكات يزود طعوني طعون … وتنكسر لا جا على راسي عصاي
سولفوا لو ما بغيتوا اتسولفون … قبل لا اقعد في الحزن رايح وجاي
واضحكوا لو بالعماله تضحكون … وجاملوني لو يضايقكم حكاي
لي وليفٍ راح جعله ما يهون … هو دواي وداي أو داي ودواي
راح لكن طيف زوله في العيون … مرةٍ قدامي ومرة وراي
وإن سكتوا جا وهو طيفه يمون … رحت أهوجس له وأبين له ولاي
مكسب عيوني من الفرقا مزووون … تمطر لطاريه والبرق ؟ أصدقاي
كل ما طروه لو هم يمزحون … احرموني من غداي ومن عشاي
أدري إنه ما تناسى الود كون … تسمع إذنه في قفاي اللسن عداي
وكانهم قالوا نسيته يكذبون … وإلا أنا فيه أمتلك نظرة وراي
كان حبه لي على خبري مصون … والله ان كني بقدري وبغلاي
ذي بقايا الحب وأطلال الجنون … والله أعلم في ضميره وش بقاي
غير طيعوني ولا عاد تسكتون … ولا والله إن أسمعكم بكاااي